Welcome to TitleSprint User Guide Here is everything you need to know to start using TitleSprint.
Choose a topic from the Table of Contents to get step-by-step instructions.
Table of Contents
Create a user
The first user is created by the super administrator at the company creation stage, other users of the company can be created by the first user in the System Settings area. The first login procedure for the first user is described in the section called Logging the first time.
NOTE – Creating new users should be allowed within the subscription chosen for the company
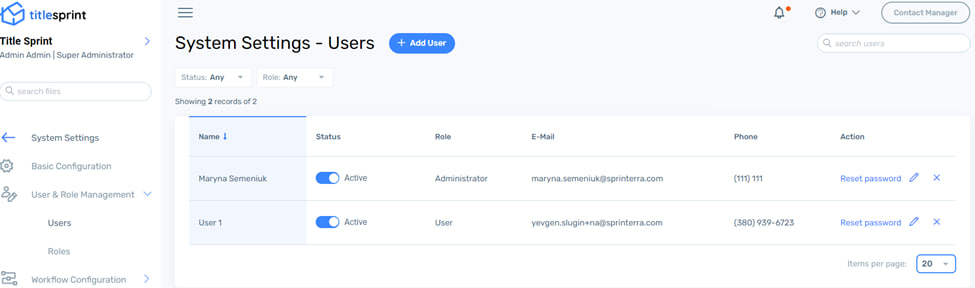
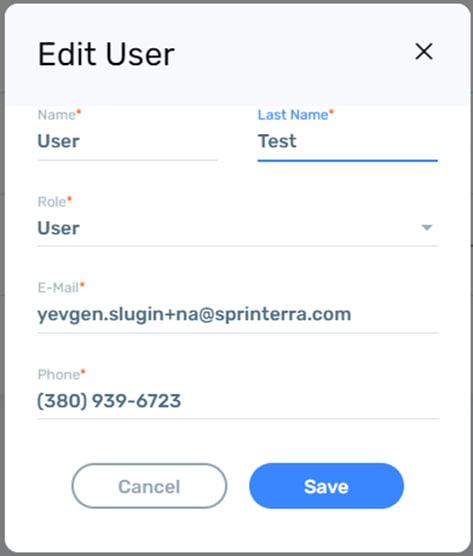
A new user is created in the System Settings – User and Role Management section. Click +Add user to call the Add User form. All mandatory fields should be filled in order to create a user.
When a user is created, a role should be selected. There are two roles available: Administrator and User.
The Administrator has permissions to use all application functionality that was provided in accordance with the subscription plan.
The User has access to all the main functionality of the application in accordance with the subscription plan, however, does not have access to the System Settings page and is unable to change defaults, manage users, and document templates.
Logging in the first time
When the Add User form is saved with all the fields completed, the user will be created. This user will receive an invitation email to the address added during registration.
Users should follow a link in the email to a page where they can create a new password.
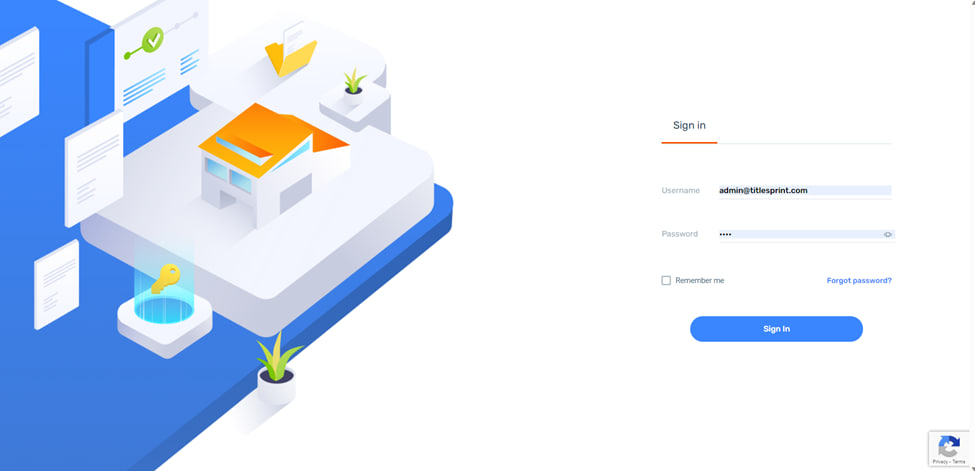
To log in to the application, users should enter their email address and their password on the login page.
Set up partner integration
Titlesprint application supports integration with partners for various functions including property search, order creation and management, working with closing protection letters and policy jackets. There are two partners available to set up the integration with – Old Republic and FNF
Integration with Old Republic (OR)
User can access two features of the integration – Closing Protection Letter and Policy Jacket.
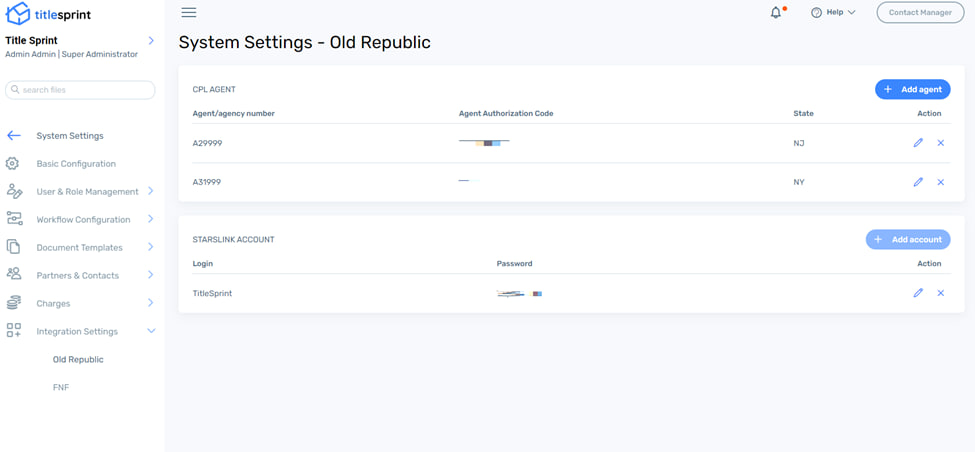
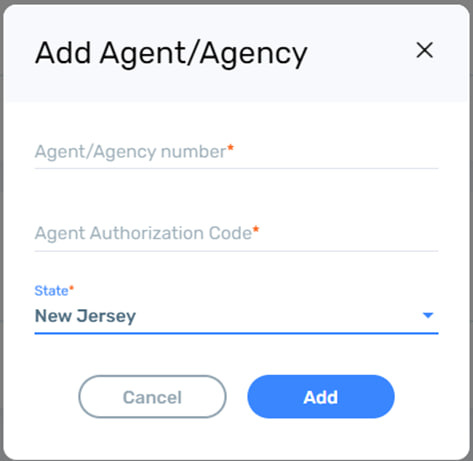
For Closing Protection Letter(CPL) users need to get authentication credentials from OR and enter these credentials in System Settings – Integration settings – Old Republic – CPL Agent.
Click on +Add Agent to call the popup and enter the credentials provided by OR. When credentials are saved, the user gains access to the CPL section of OR functionality in the File.
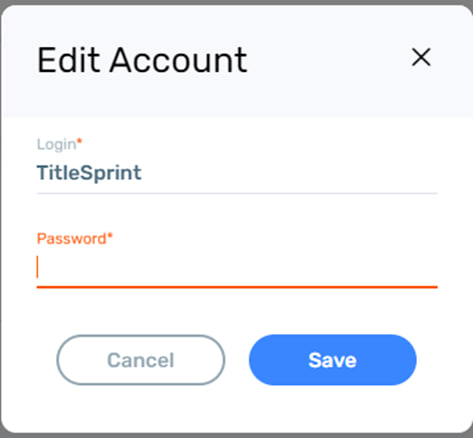
For the Policy Jacket user needs to get authentication credentials from OR and enter these credentials in System Settings – Integration settings – Old Republic – Starslink Account. Click on +Add account to call the popup and enter the credentials provided by OR. When credentials are saved the user gains access to the Policy Jacket section of OR functionality in File
Working with the application
Files
Creating a file – Property Lookup
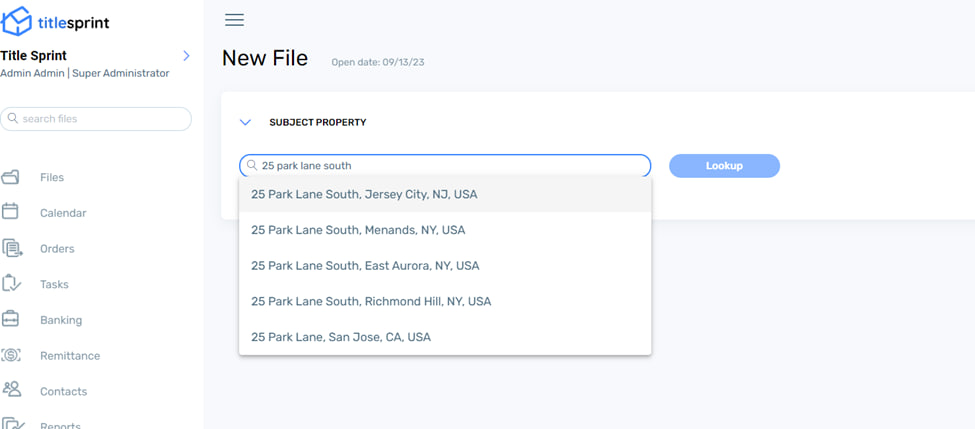
The File is the main element when working with TitleSprint. The user creates a file on the application’s main page by clicking +Add File. This opens a property search page. Users can enter the desired address and Google integration will help to find this address and avoid mistakes.
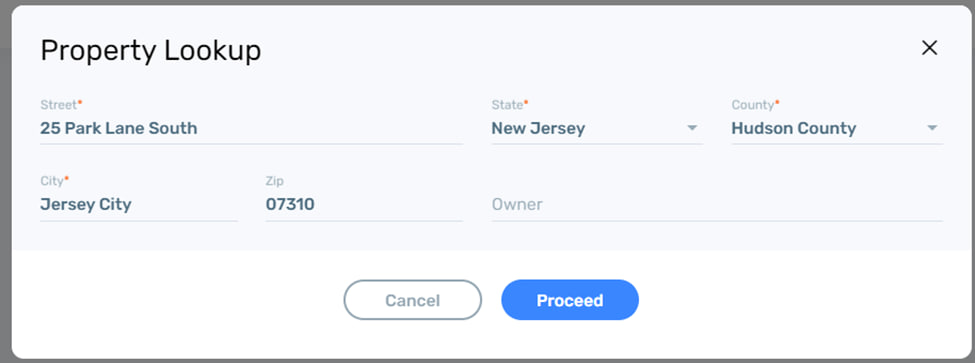
Click Lookup to proceed – a Property Lookup popup screen will appear with address fields pre-filled from the Google-assisted search. Users can click Proceed to create a file using the information on the screen.
Otherwise, if the Property lookup integration is enabled for the company, users can click Lookup and find properties located at this address. A search will be done with First American and the results shown on the popup screen. Users can select a property from the results and proceed with file creation, or start a new search .
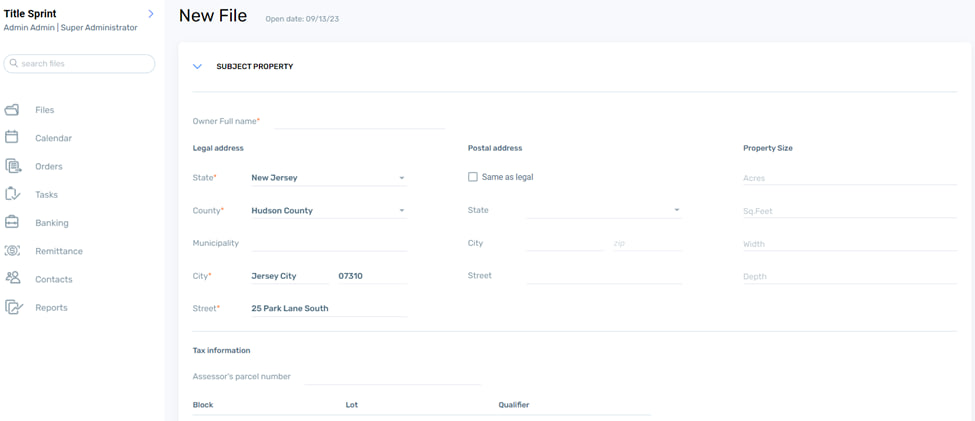
When the user clicks Proceed, a file creation form is presented, where all required fields should be completed, as well as any other fields the user considers necessary.
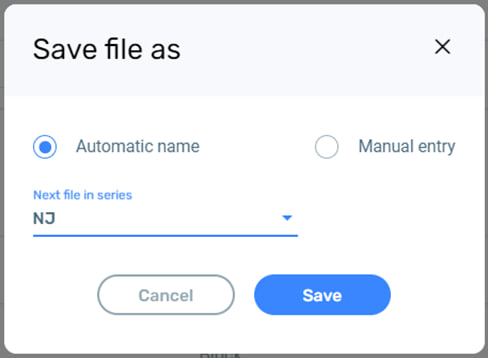
When a user clicks save, the file name popup will appear. File names can be generated automatically or entered manually by the user.
When the form is saved, a new file will be created. All created files are added to the list of files. Basic file information can be seen on the list. All files have statuses indicating the progress made on the file.
Working with a file
To work with a file, the user can select a file from the list by clicking the file name. By default all files are opened on the Profile page, however, the file will open the page that the user left when working with it the last time.
Profile
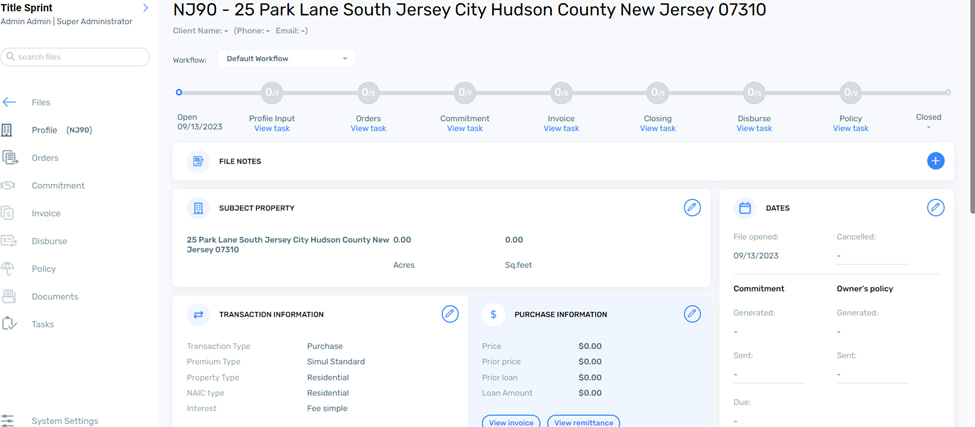
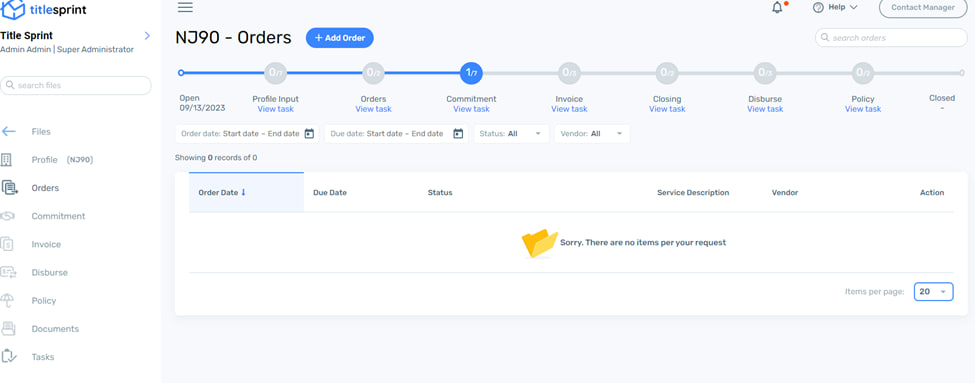
On the profile, the user can manage main file data and monitor progress when working with the file.
Progress is monitored using the Workflow bar at the top of the page.
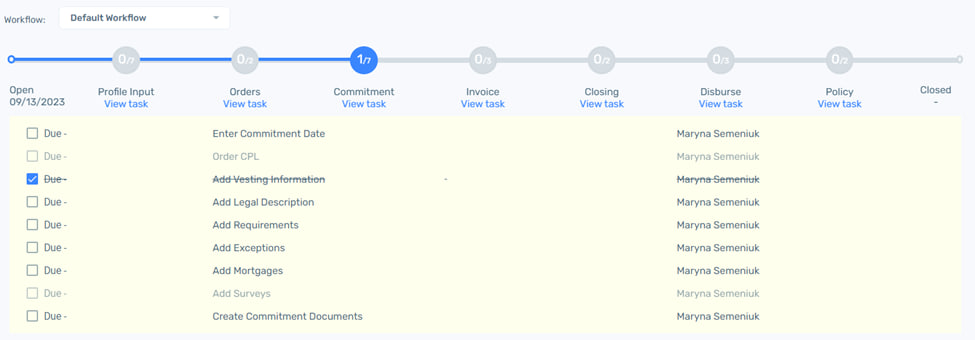
Users can see required milestones in the bar, indicating steps required to complete the file. Each milestone contains tasks that can be viewed by clicking the View Tasks link. Each milestone contains a separate set of tasks. The user needs to mark all the Required tasks as completed in order to complete the milestone. The non-required tasks use light gray font in the task list.
Admin users can create custom Workflows in the System settings area. These workflows are available at the top of the Workflow section in the “Workflow:” dropdown.
In the subject property user can edit the property information. To edit property details the user clicks on the pencil icon in the top right corner to call a popup.
Property information can be edited in the popup.
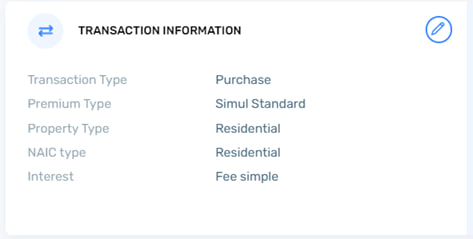
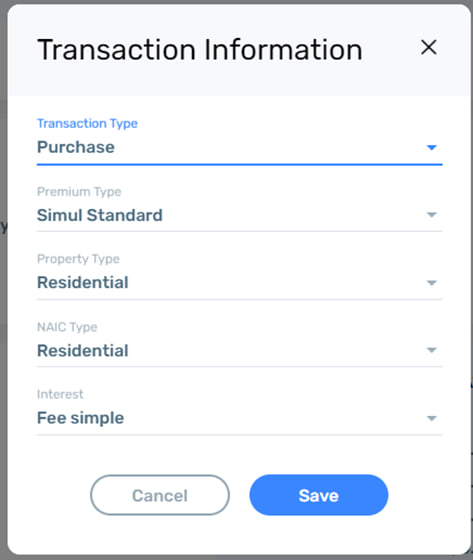
In the Transaction information section, user can view and edit transaction information for the file.
The transaction information will vary depending on the state the property is located in. A current example is for the state of New Jersey. Users can edit the information by clicking the pencil icon in the top right corner to call a popup.
The transaction type can be selected from the following options: Purchase and Refinance.
The available premium types are Standard and Simul Standard.
The property type is Residential or Commercial.
NAIC type is Residential or Non-Residential.
Interest calculation options are Fee Simple and Leasehold.
The information selected in this section will define the next steps that will be taken to complete the file.
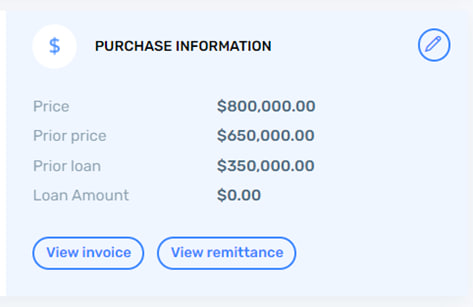
The Purchase Information is another crucial area where costs related to the purchase of refinance of a property are defined.
User can edit the section similarly to the previous sections. Also, this section contains View Invoice and View Remittance buttons, which, when clicked open respectively Invoice and Remittance pages.
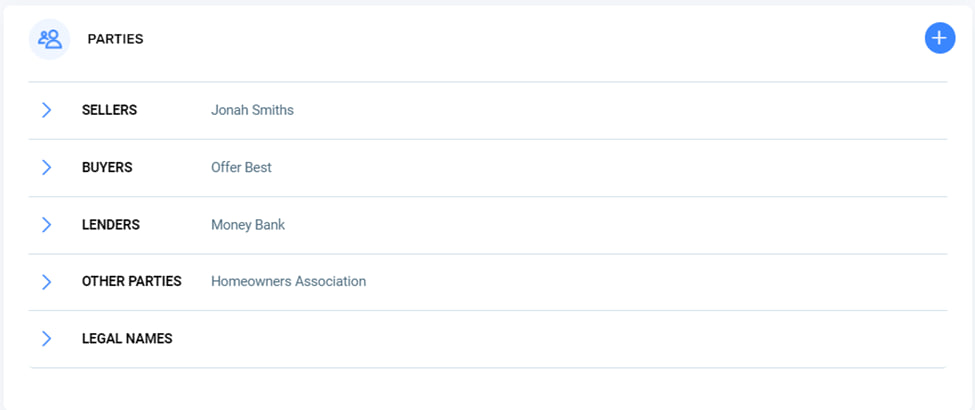
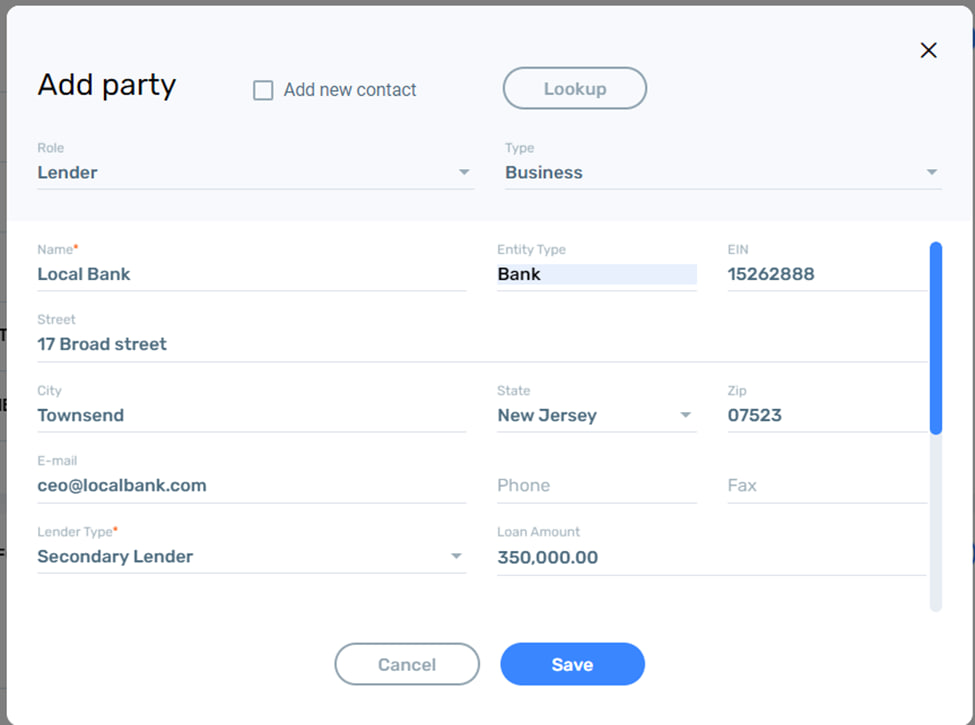
The Parties section contains information about the parties involved in the transaction. Users can add parties by clicking the + button in the top right corner of the section.
Users can select a party role and type in the popup screen. There are multiple party roles and two types – Individual and Business. Depending on the Role, the party will appear in the Parties section when saved.
It is essential when adding a Lender party to indicate the Loan amount. This information will be used further in the file.
Users can add a party as a contact to the Contacts section or find a previously added contact using the Lookup button at the top of the popup screen.
In the Legal Names section, the legal names of the buyer and seller are selected.
In the Client Information section, a client can be selected. A client can be one of the parties added to the parties section – the buyer, the seller, or the lender. Also, the Underwriter and title company branch is selected in this section. The Underwriter and the branch are selected from a dropdown list. The database of Underwriters and branches can be managed in the System Settings.
The section is edited by clicking the pencil icon in the top right corner to call a popup.
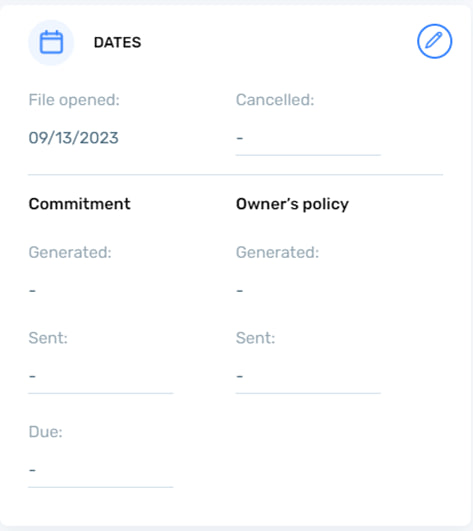
The Dates section contains information about important dates related to the file and the property closing process
This includes the date when the file was opened, the cancellation date if there was a cancellation, the commitment document generation date and due date, and the owner’s policy generation date.
The section is edited by clicking the pencil icon in the top right corner to call a popup.
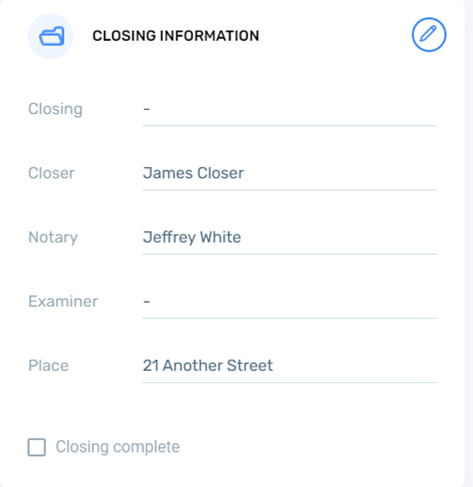
The closing date is managed in the Closing Information section.
The Closer, Notary, and Examiner information is received from the Parties section, where these parties should be added. The closing place is selected from the list, and the list of closing places is edited in the System Settings. The Closing field contains the closing date. This is selected when the work on the file is nearing completion, and the date and location for the closing procedure was established.
When the closing date is selected, all the parties in the closing information section as well as the buyer and seller, receive a notification email. The sending of the notification email can be configured in the System Settings.
The user can check the Closing Complete checkbox when the closing has been completed. This indicates that the work in the file is fully completed, and the file assumes Completed status and is blocked from being edited.
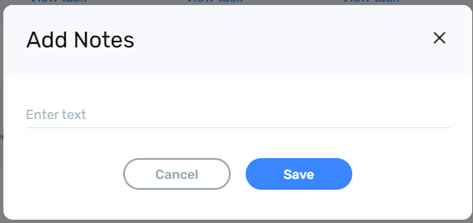
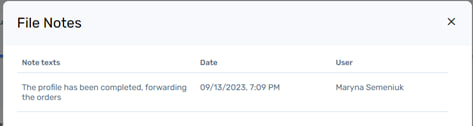
File Notes
Pages in the file contain the File Notes section. This is a place where users can add free text notes related to the file. The notes are added by clicking the + button in the top right corner of the section.
Once the note is saved, it cannot be edited or removed. By clicking the View More link, the user can see all the notes added to the file on the list.
The Notes section appearance can be customized in the System Settings. Admin users can edit the width of the Notes section and the amount of text visible by default.
Orders
In the orders section, users can order tasks related to the file and the property in question to do due diligence. The orders are fulfilled using integration with First American title company and their subsidiaries, Charles Jones and DataTrace.
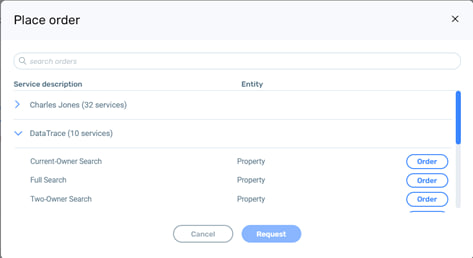
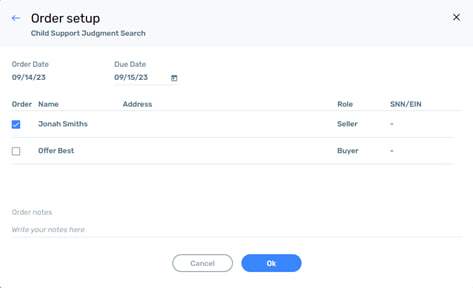
A user can place an order by clicking the +Add Order button and calling a popup.
In the popup, orders can be selected by expanding the branded sections. Orders can be made for property or individuals.
A property order contains a property address, while individual orders allow the user to select an individual or multiple individuals to run the order for. When multiple individuals are selected, the application will create a number of orders according to the number of selected individuals.
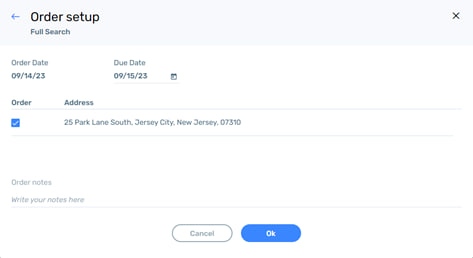
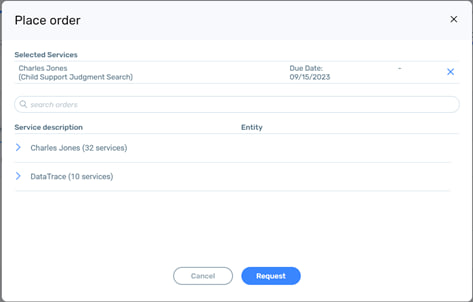
When clicked Ok the user will be taken to the Place Order screen, where selected orders will be shown in the Selected Services section. Also, the user will be able to add more orders from the Service Description section.
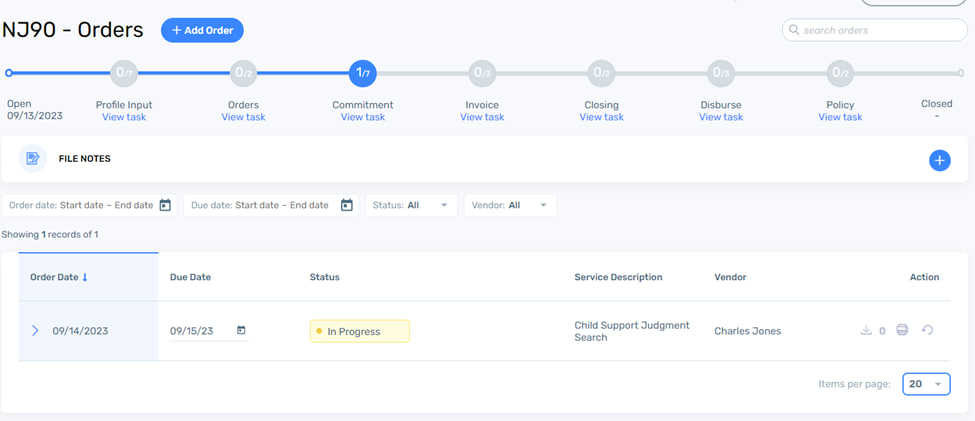
Users can send the selected orders to the First American by clicking Request in the above popup screen. The orders will be sent and added to the active order list on the Orders page. Each order will have a status that the user can track to see order progress. The order returned from the First American is stored in the Documents section.
Commitment
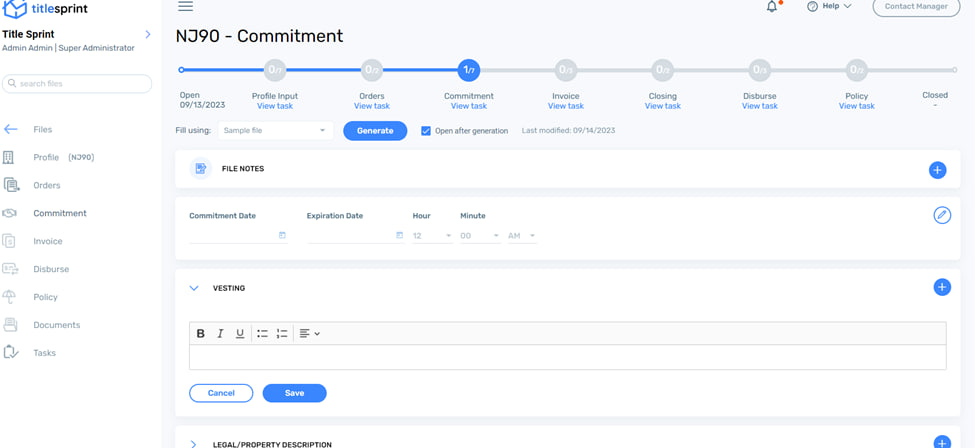
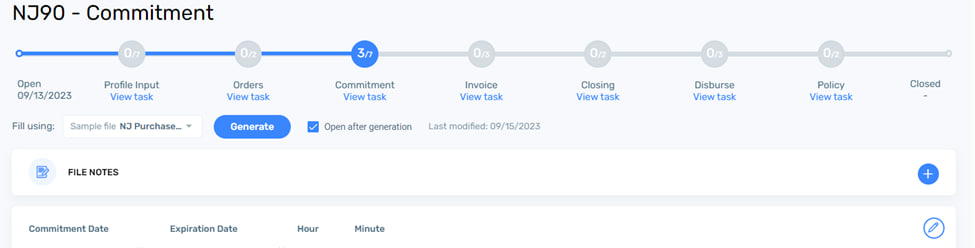
In the Commitment section user can fill out the commitment document, and set the commitment date and document expiration date.
The sections of the document that require completing are divided into sections on the page, where the user can fill out the required information section by section, using the available templates.
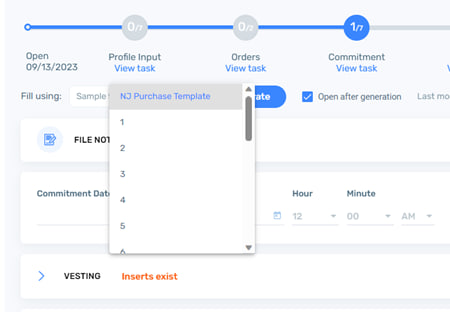
To add a commitment document template, users can click on the Fill using: dropdown and select a template to use in the commitment document. The template will add template texts to each of the sections on the commitment page.
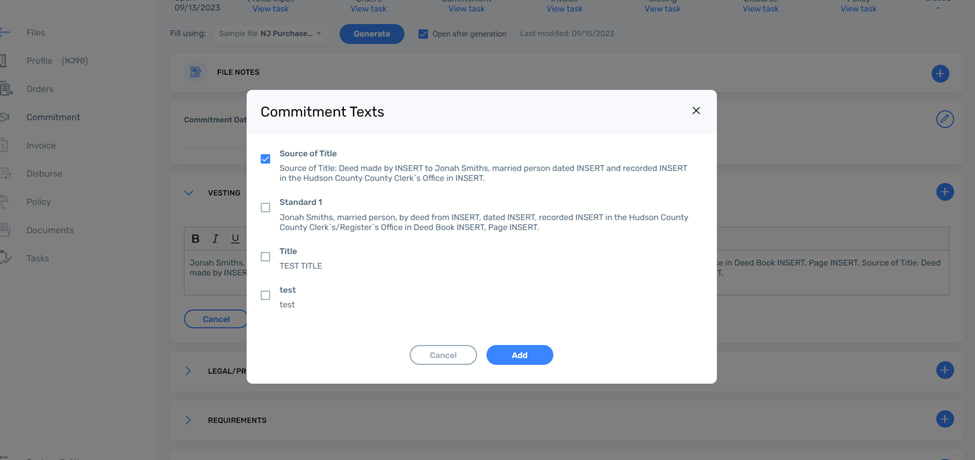
Templates in each section can be edited individually and also be customized using preset texts. To select a custom preset for a section of the commitment document the user clicks the + button in the top right corner to call a popup with custom text options.
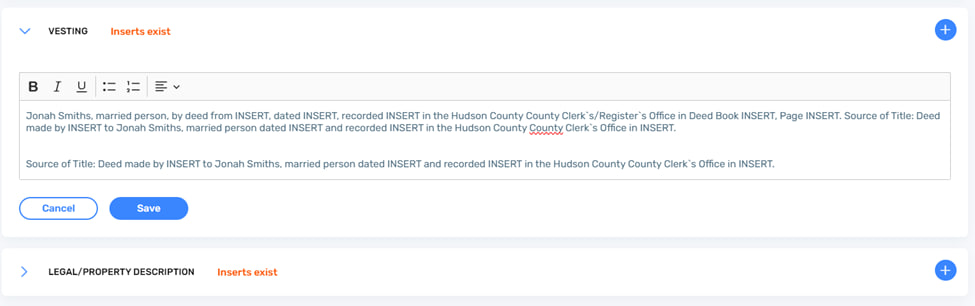
The preset can be selected by checking a checkbox. The content of the preset can be edited in System Settings. Users can also edit the resulting text in the section text box after adding the preset to the section.
When form editing is completed, the user can generate the finished document by clicking the Generate button at the top of the page. The generated document will be added to the Commitment folder on the Documents section of the File.
When the user checks the Open after generation checkbox along with being saved to the Documents folder, the commitment document will be opened in another browser tab or saved to the local folder, depending on the browser settings.
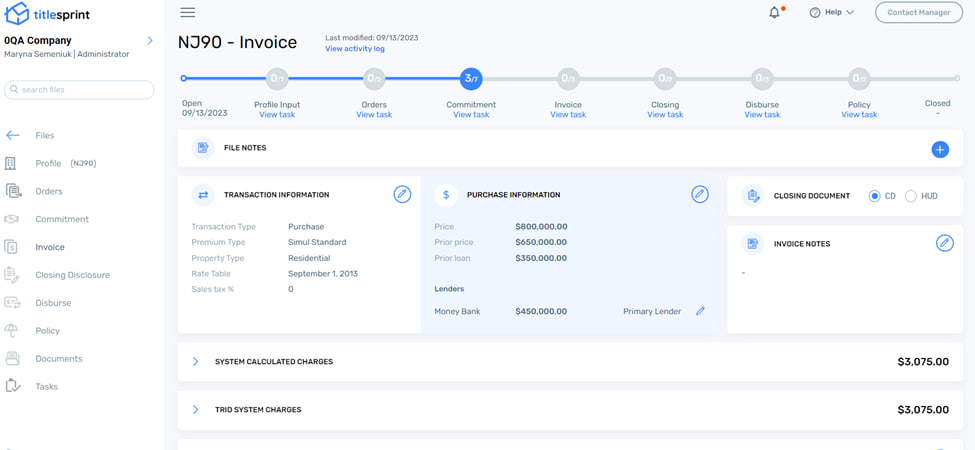
Invoice
On the Invoice page, an invoice is formed, comprising all the costs associated with policy premiums for involved parties, due diligence, and other expenses.
User can review their transaction details in the Transaction Information section. This section duplicates the same section on the Profile page.
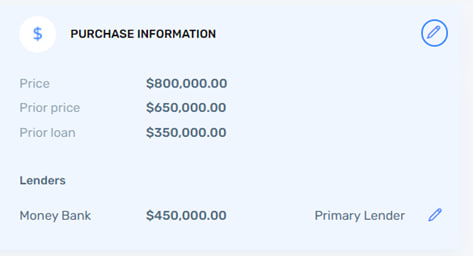
On the Purchase Information section, users can review price-related information. This section is also similar to the Purchase Information section on the Profile page except the Lenders subsection, where lender and loan amount information is shown.
Users can edit the section by clicking the pencil icon in the top right corner of the section.
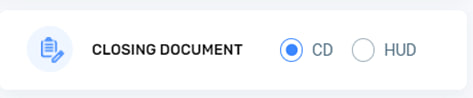
In the CD/HUD section, the user can select a type of closing document to use in this file. The selected closing document is available in the file as a separate menu item in the left-hand menu.
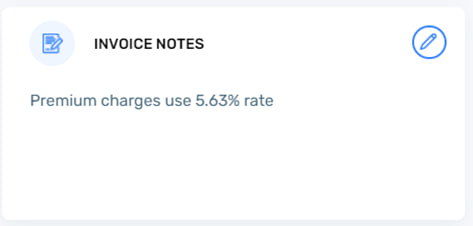
The user can leave an invoice note on the Invoice page using the Invoice Notes section. This note can be edited by clicking the pencil icon.
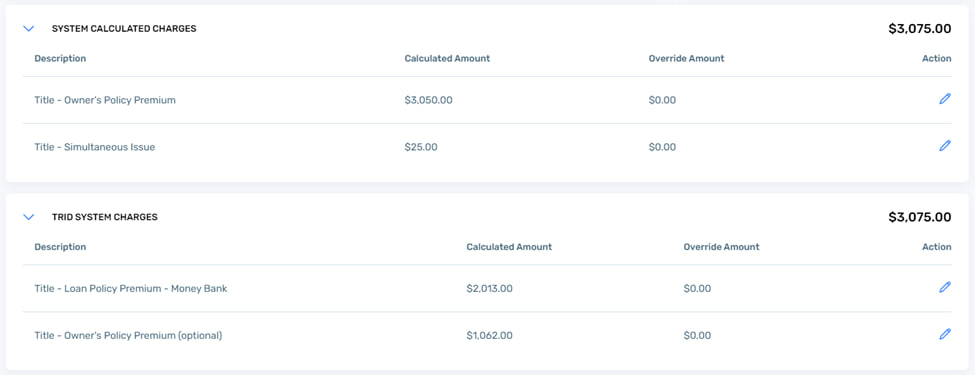
All the sections below show the calculated costs associated with the file. In the System Calculated charges policy premiums are listed.
The number of premiums in the section is based on the Premium Type selected in the Transaction Information section. The type of premiums shown are based on the Transaction Type selected in the Transaction Information section and also the state the property is located in. The premiums are calculated automatically, and the calculation is based on a number of parameters; these are different from state to state but may include:
Property location to identify premium rates
Purchase price or loan amount, depending on the transaction type.
Transaction type
Property type
Prior price or prior loan, depending on the transaction type.
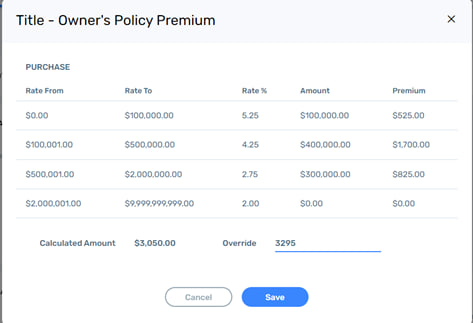
Users can override the calculated amount by clicking the pencil icon and calling the Policy Premium popup, where the rate table is shown, and the override amount can be entered in the Override column.
Once the change is saved, the overridden amount will be shown in the Override Amount column.
In the TRID System Charges the premium amounts are shown in accordance with the TRID guidelines.
The TRID section amount is not an additional amount to the System Calculated Charges. The premiums in the TRID section can also be overridden similarly to the System Charges.
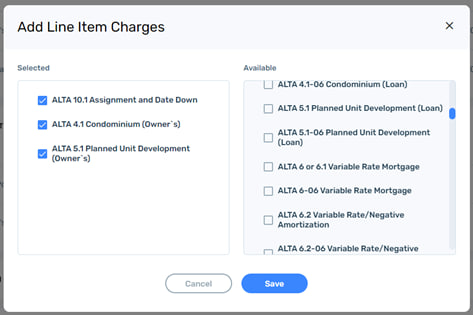
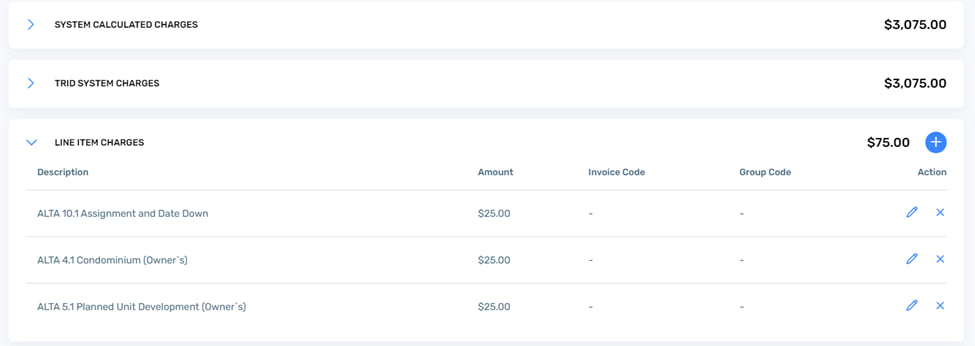
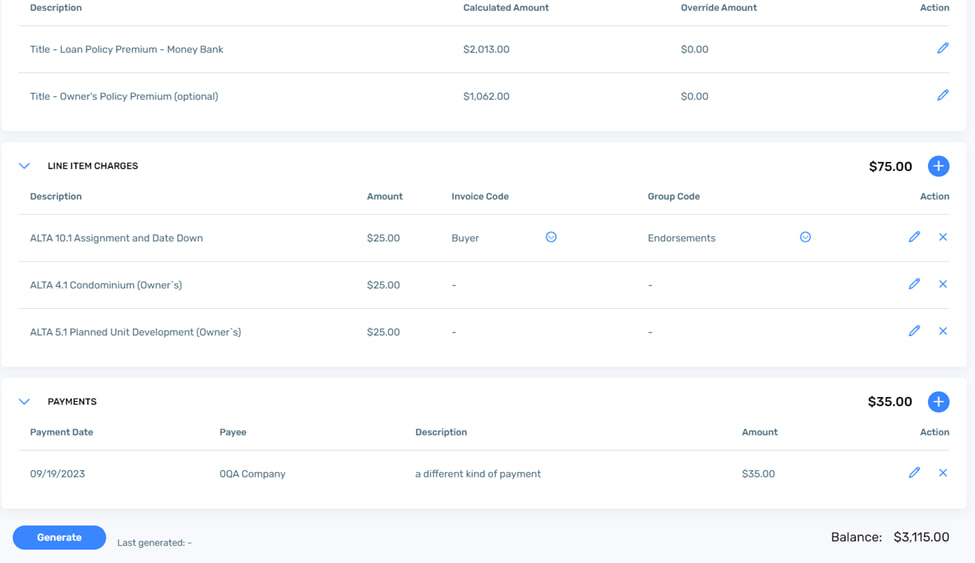
In the Line Items section users can add endorsement charges for the property.
The endorsements(line items) are selected from the list by clicking + icon. The endorsements are added to the list in the System Settings and the list is compiled separately for each state.
The Line Item Charges are selected from the list by checking the checkbox next to the required line item. The line items are saved to the Invoice page when the user clicks Save.
Line item amounts are pre-set in the System Settings but can be overridden by clicking the pencil icon and editing a line item in a popup screen.
The Invoice code and Group code define line item position in the invoice document. These can be preset in the System Settings or edited on the edit line item popup.
On the edit popup user can edit the following parameters:
Override description – in this field users can enter a description to replace the existing description of the line item.
Override amount without sales tax – user can enter an amount for the line item that is different to the default amount.
Override tax amount – user can enter a tax amount different to the calculated tax amount.
Override HUD line – user can select a different line in the HUD document where this line item expense will be recorded to. This is only relevant if the user has selected HUD in the CD/HUD section on the Invoice page.
Override Closing disclosure section – user can select a different section in the Closing disclosure document where this line item expense will be recorded to. This is only relevant if the user has selected CD (Closing Disclosure) in the CD/HUD section on the
Invoice page.
Override Due – user can select when the line item payment is due (at or before closing) and this defines the column the line item will be added in the Closing disclosure document.
Override % – by indicating a percentage value a user can redistribute the line item cost between the owner and the buyer. As can be seen on the screenshot above, the default value is 100% buyer.
Invoice code – user can change this to relocate the line item to a different section in the invoice document.
Group code – user can change the code to relocate the line item to a different group in the closing document
If a user overrides an invoice code or a group code, a message to confirm this appears in the LIne Items section.
Payments
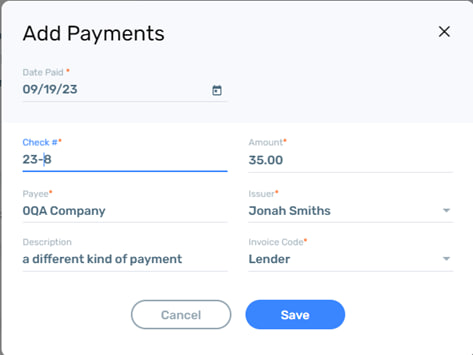
In the Payments section users can add any payments related to the invoice that do not fit into previous categories.
The payment can be added by clicking the + icon in the top right corner of the section. A popup will be shown, where user can manually complete the payment information fields
The saved payment is added to the Payments section
When user has completed the work on the Invoice section, they can generate the invoice document by clicking the Generate button at the bottom of the page.
The generated invoice document will be saved in the Documents section. A PDF copy of the invoice will be opened in a new browser tab if the user’s browser settings allow this.
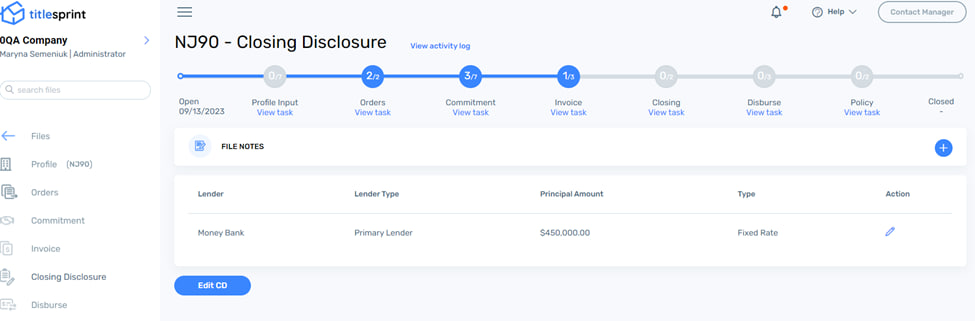
Closing Disclosure/HUD
In the Closing Disclosure (CD)/HUD section users can edit the chosen closing document. The main page contains basic information about the lender and loan amount and allows users to choose rate type by clicking the Pencil icon and selecting the rate from Fixed and three types of Adjusted rate.
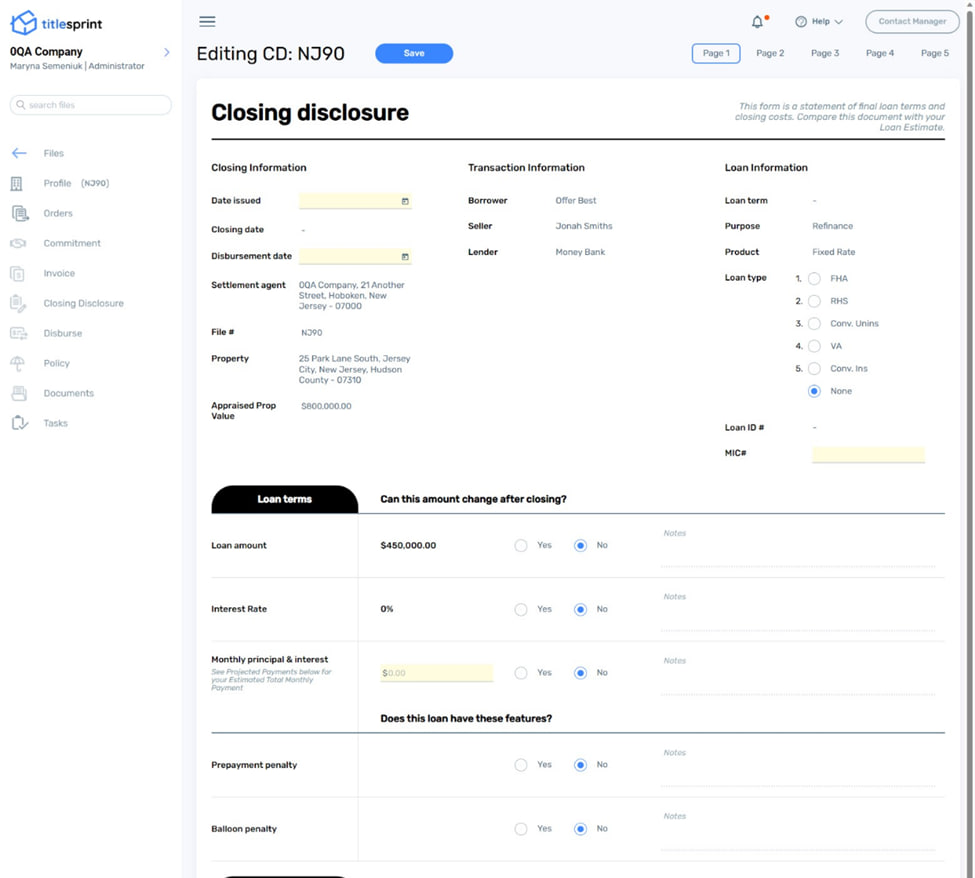
To edit the CD document the user can click the Edit CD button to open the CD form.
The CD document consists of 5 pages, reflecting the standard CD document. The first page contains general information as well as information about loan terms, payment projection and costs due at closing.
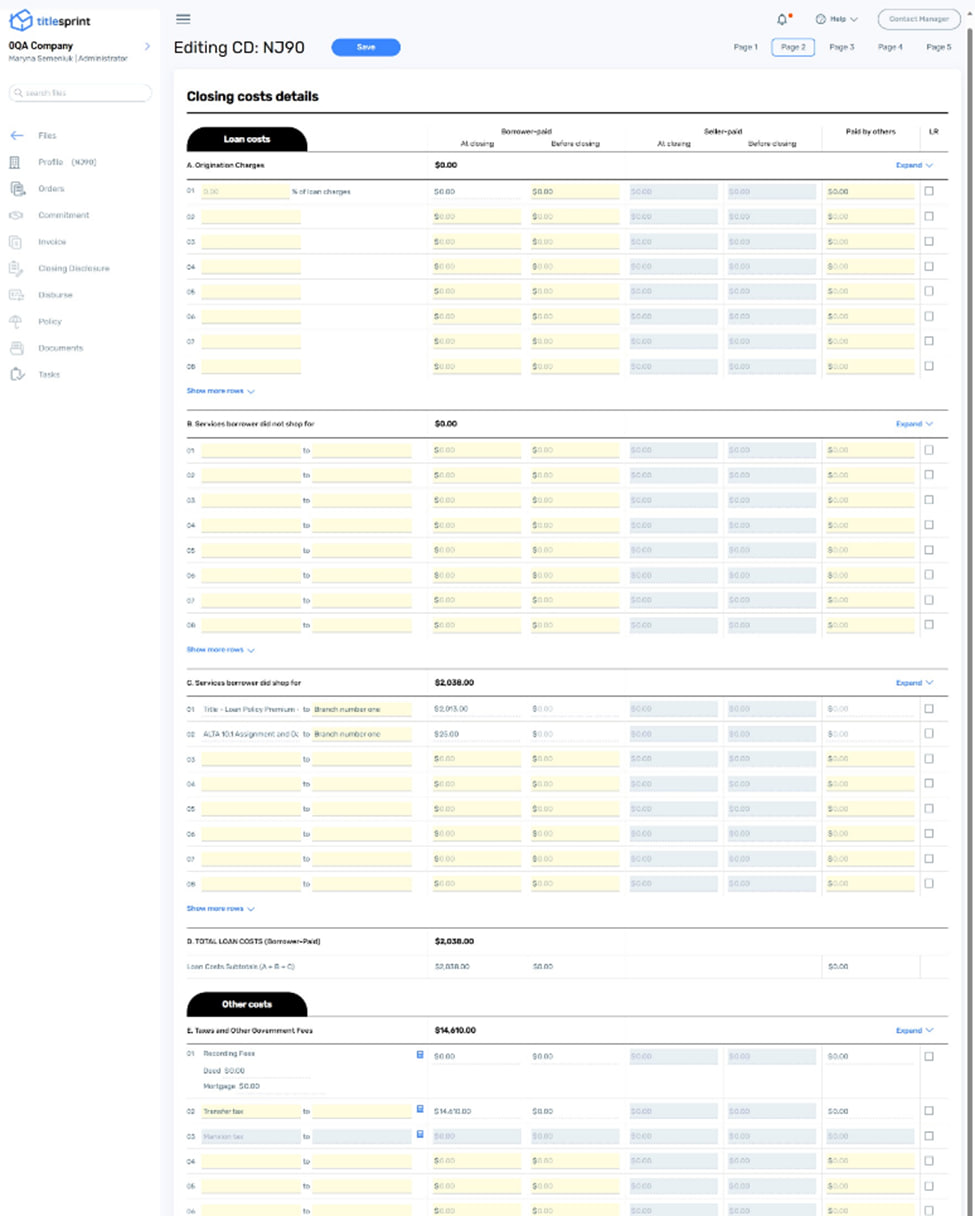
The second page contains information about all the incurred loan costs as well as other costs associated with the loan and closing procedure. This table also indicates the party incurring the costs (borrower, seller or other parties) and when the costs are due (at or before closing).
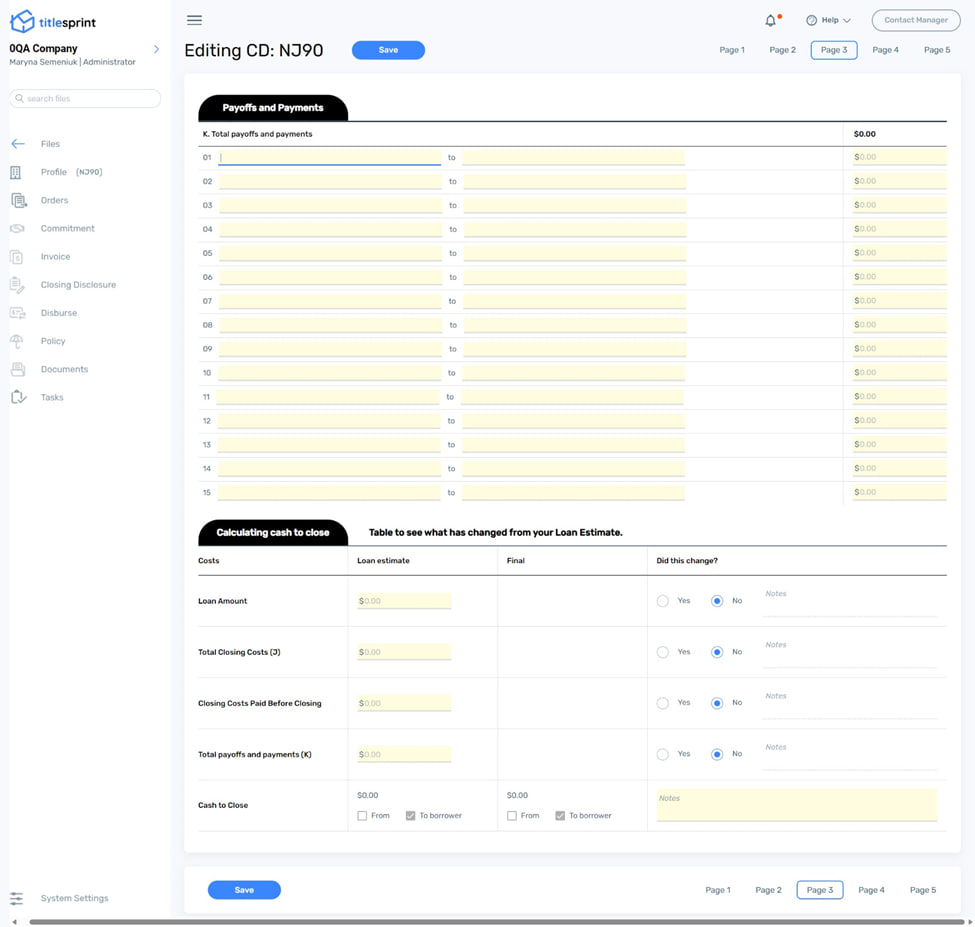
The page 3 of the CD document contains continuation of the costs table, there is a payoffs and payments table where payments not fitting other sections, are included, and also the calculated amount due to close.
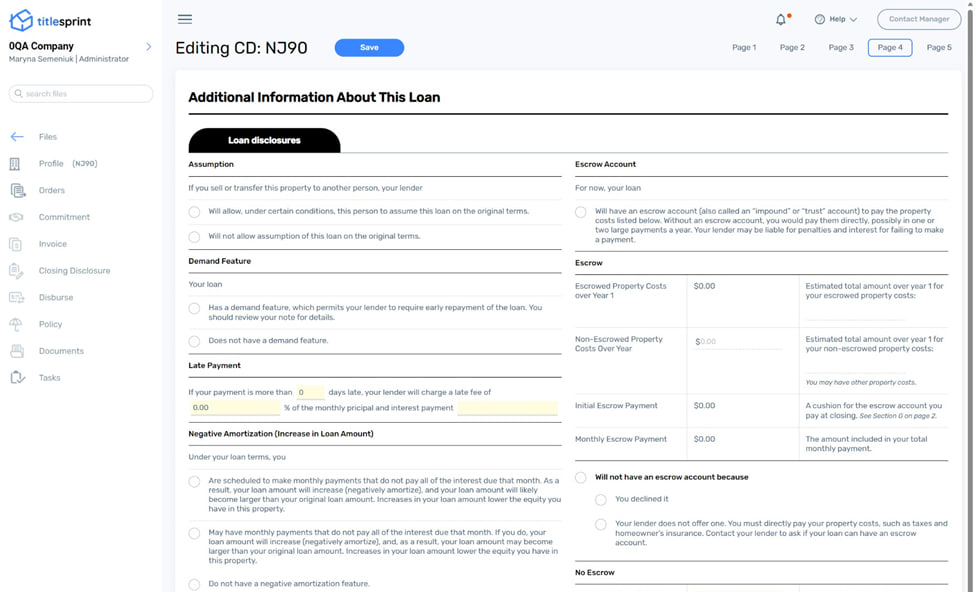
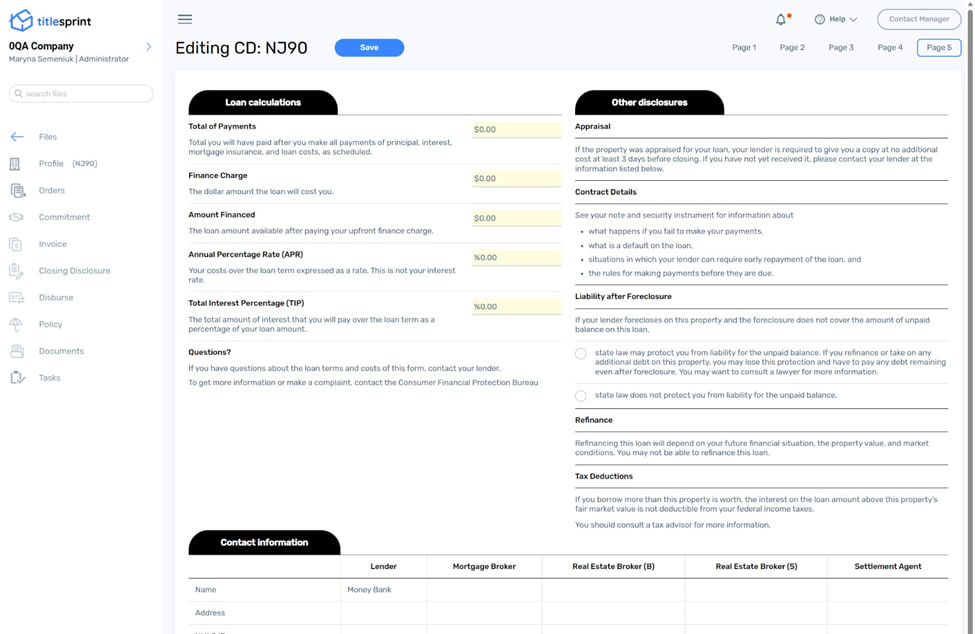
Pages 4 and 5 contain loan disclosure information, final loan calculation and other disclosures, as well as contact information.
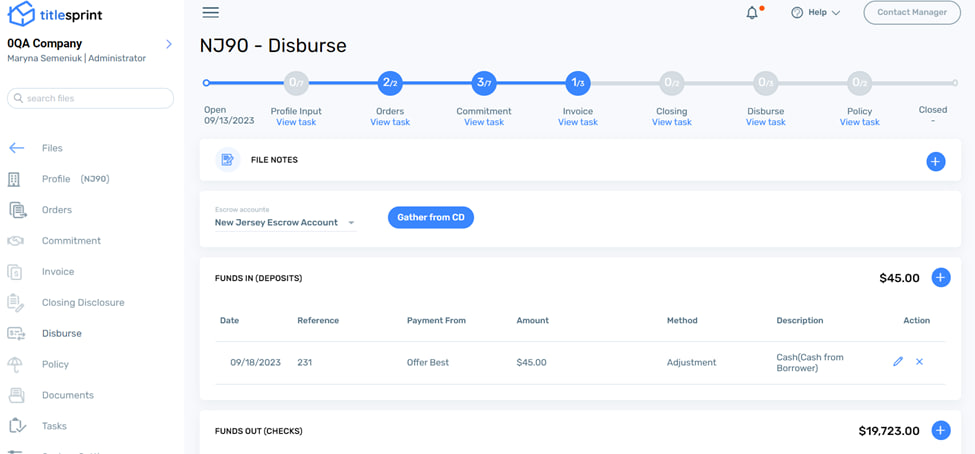
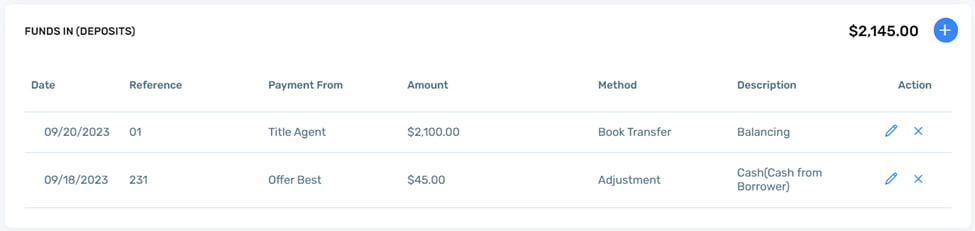
Disburse
In the Disburse section the balance of Funds In and Funds Out is calculated to allow users to understand the amount of compensation required to balance out the checks and deposits.
All payments are associated with the payment account, which is selected in the payment settings at the time when payment is added or created on the Invoice page. User can select payments associated with this account on the Disburse page by clicking the Escrow account dropdown at the top left of the page.
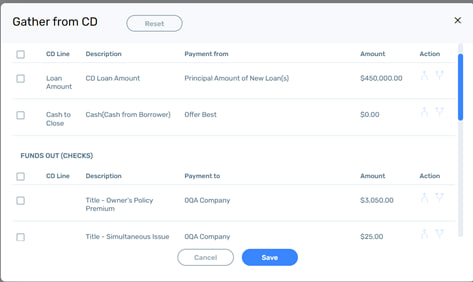
Payment records can be pulled to the Disburse section from the CD document or created manually. To pull payments from the CD document click Gather from CD button to call a popup.
Users can select a payment or several payments to save to the Disburse page. The top checkbox in each section selects all payments in the section.
Payments can be split between parties and also combined in one.
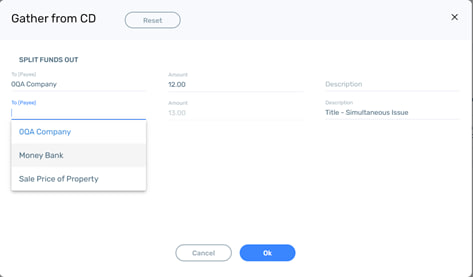
To split a payment user must select at least one payment and click the Split icon in the Action column.
The Split menu will be shown, where users can choose parties from the list of parties in the file, to split the payment between. Users can choose the amount for one of the parties in the top field of the Amount column. The amount for the second party will be calculated automatically by subtracting the user entered amount from the initial payment amount. Note that the user is unable to enter an amount exceeding the initial payment amount. Also user can choose a description for the split payment and enter it manually in the Description field.
When user clicks Ok the split payments will appear on the list of payments to pull into the Disburse page.
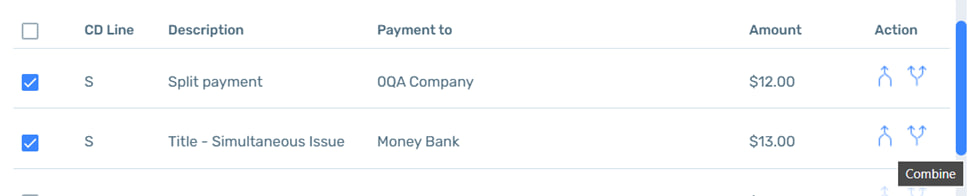
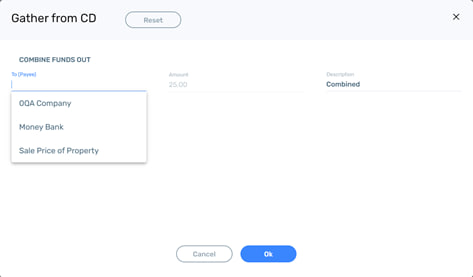
User can also merge several payments into one payment by first selecting at least two payments and then clicking on the Combine action in the Action column.
A popup will appear where the user selects a party to make the combined payment to and optionally can edit the payment description.
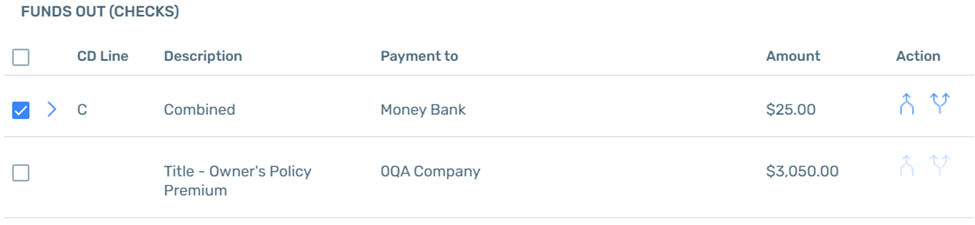
The combined payment will appear on the list when the user clicks save.
Users can view the payments that formed the combined payment by clicking a chevron next to the checkbox.
The payments with checkboxes checked are saved to the Disburse page.
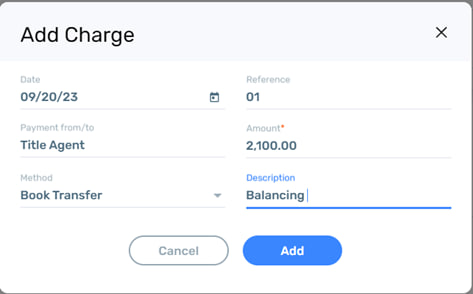
Users can edit the payments by clicking the pencil icon or add new payments by clicking the + button. When adding a new payment, only the payment amount is a mandatory field.
Users are free to select a date and enter the amount, the description, the payment from/to, and the reference. The method is selected from the dropdown list of available payment methods.
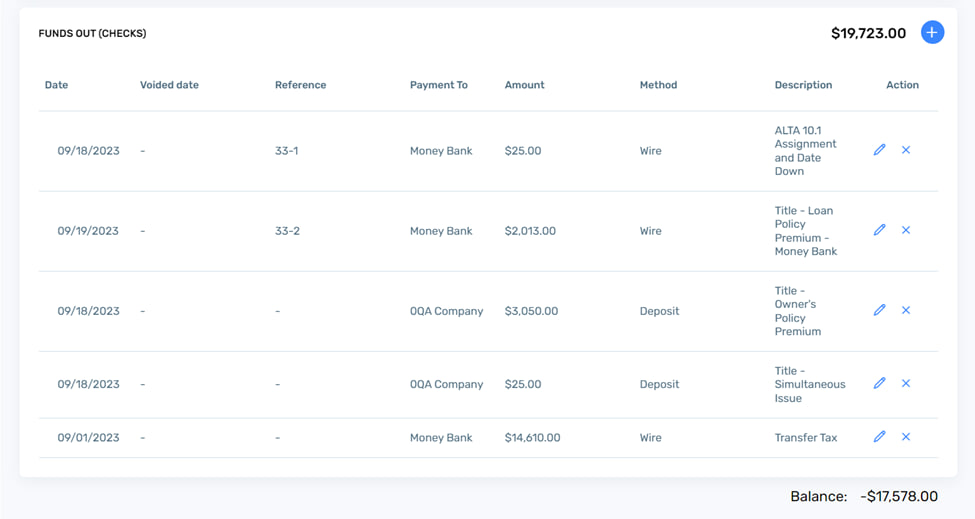
When added, the payment will appear in the section it was added to.
At the bottom of the Disburse screen is a Balance showing the current balance between the funds in and funds out. . Manipulating the payments on the screen will change the Balance accordingly.
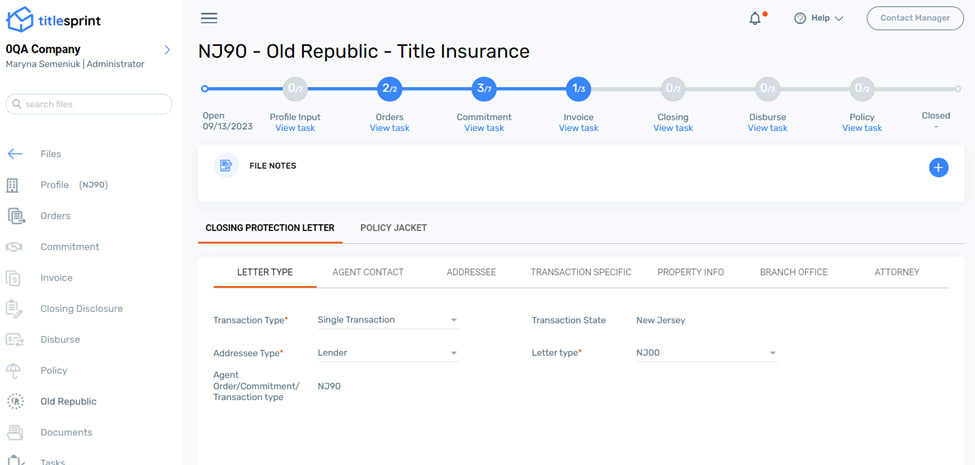
Integration
Integration access is provided when the user has entered integration credentials on the partner integration setup page, and the Underwriter selected on the Profile page of the file is supported by the integration partner.In this example, the integration partner is the Old Republic, and the Old Republic menu item has appeared in the left-hand menu on the screen.
The Old Republic integration provides functionality to create Closing Protection Letters and Policy Jackets.
CPL
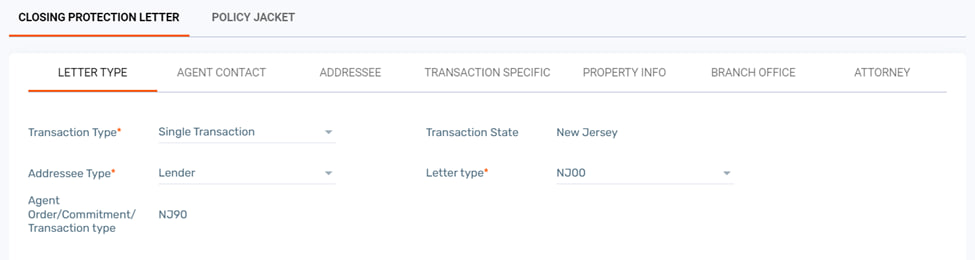
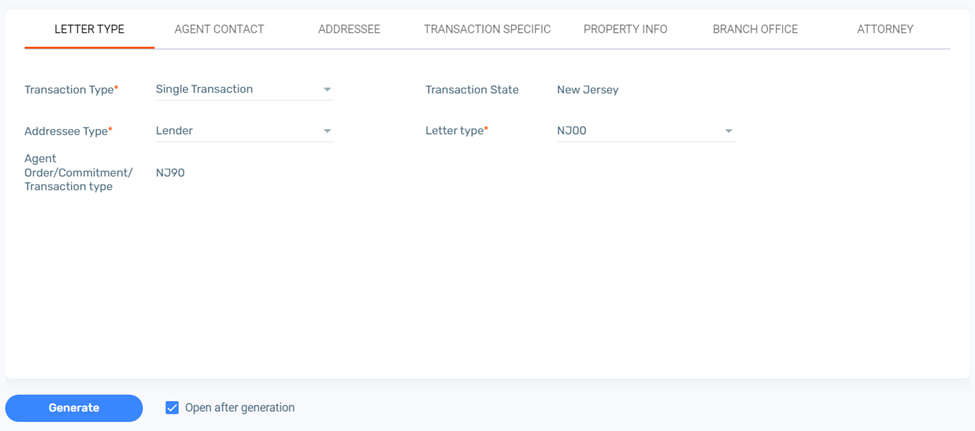
The Closing Protection Letter(CPL) functionality includes a form with 7 tabs. Most information is pulled to the tabs automatically from the data entered by the user previously in the Profile and Invoice sections of the file.
The Letter Type section contains transaction information. Users can select between Single and Cash transaction types, this will dictate the available Addressee type, Lender for Single transaction, and Buyer for Cash.
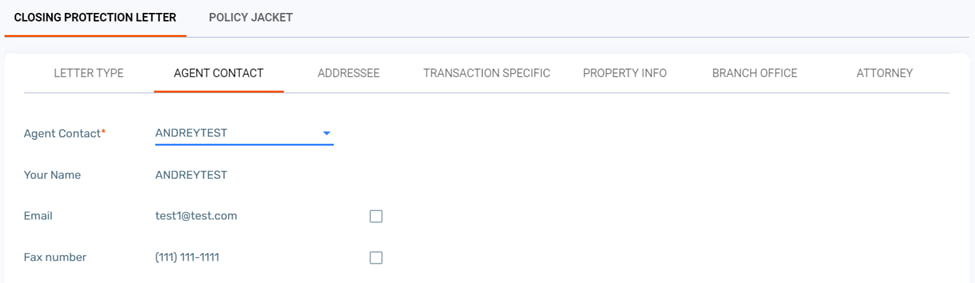
The Agent Contact information is received from the Old Republic account, and the user can select the agent profile to use with this CPL from the dropdown.
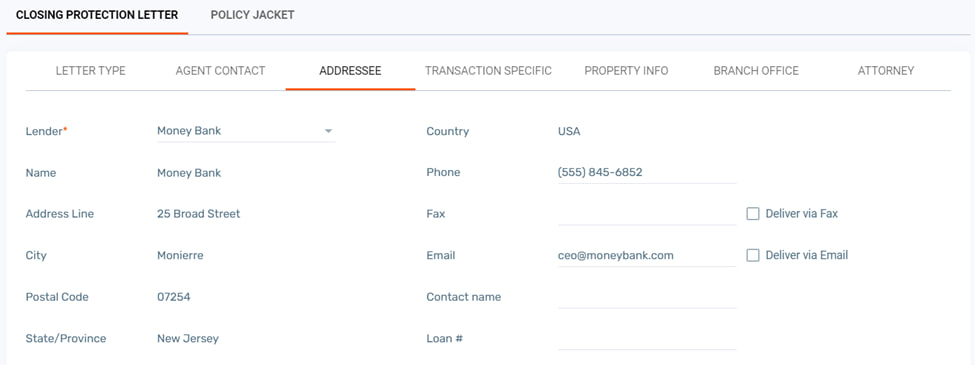
The Addressee section contains lender information, this is pulled automatically from the Profile page in the file.
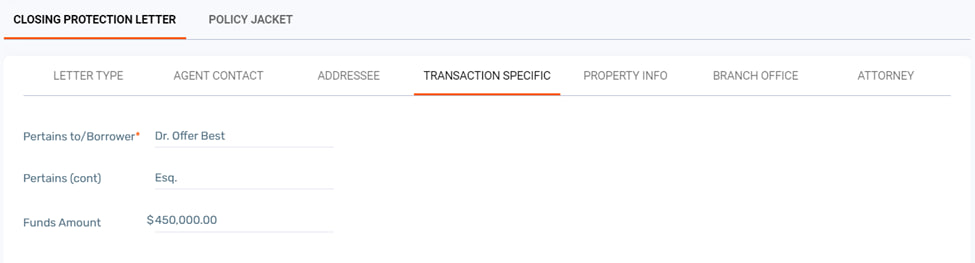
The Transaction Specific tab contains information about the borrower and loan amount, this is also pulled from the Profile page.
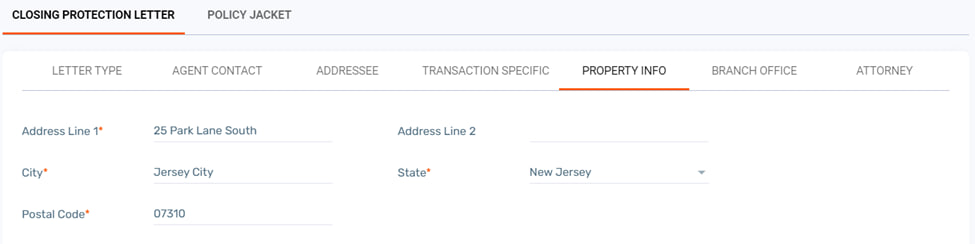
The Property info is the address of the property in the file, and this is pulled automatically from the Profile page in the file.
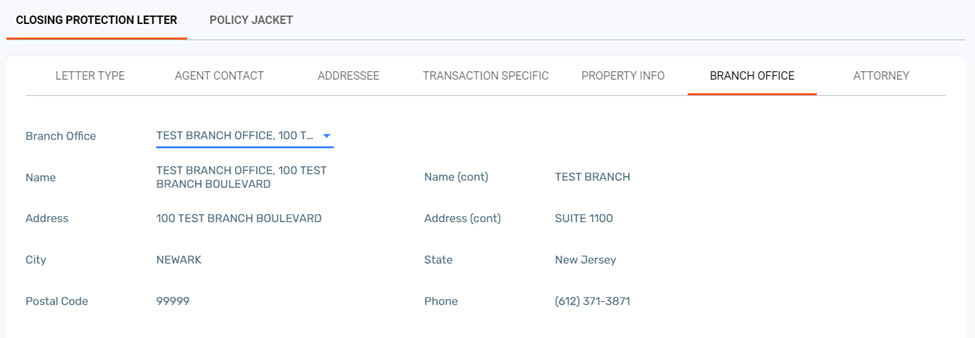
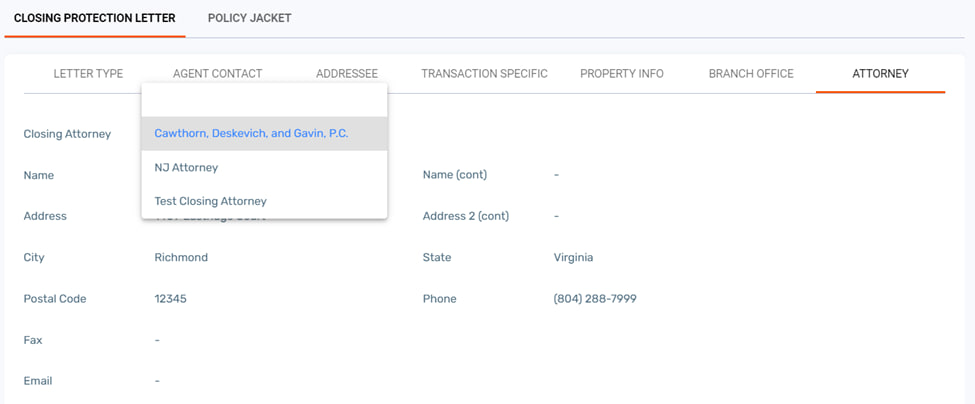
The Branch Office and Attorney pages provide information about the branches and attorneys, which is received from the Old Republic.
Users can select a Branch Office and an Attorney from the dropdown list made available by the integration partner.
To generate the CPl, having filled and checked app tabs, the user can click the Generate button.
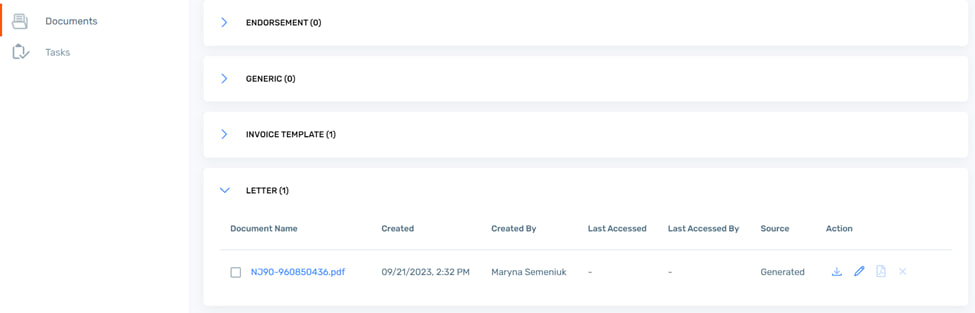
The CPL document will be generated on the integration partner side and stored in the CPL tab in the partner section. When the Open after generation checkbox is checked a PDF of the generated CPL will be opened in a new browser tab.
User can view generated CPL statuses in the Letter Maintenance section.
CPLs can be downloaded as PDFs by clicking the Download button or canceled by clicking the Cancel button.
User is required to cancel an active CPL before they are able to generate a new CPL document.
The CPL documents are also saved in the Documents section.
When a CPL is canceled, the PDF copy of that document is removed from the Documents section automatically, and the status for the CPL in the Letter Maintenance section becomes Cancelled.
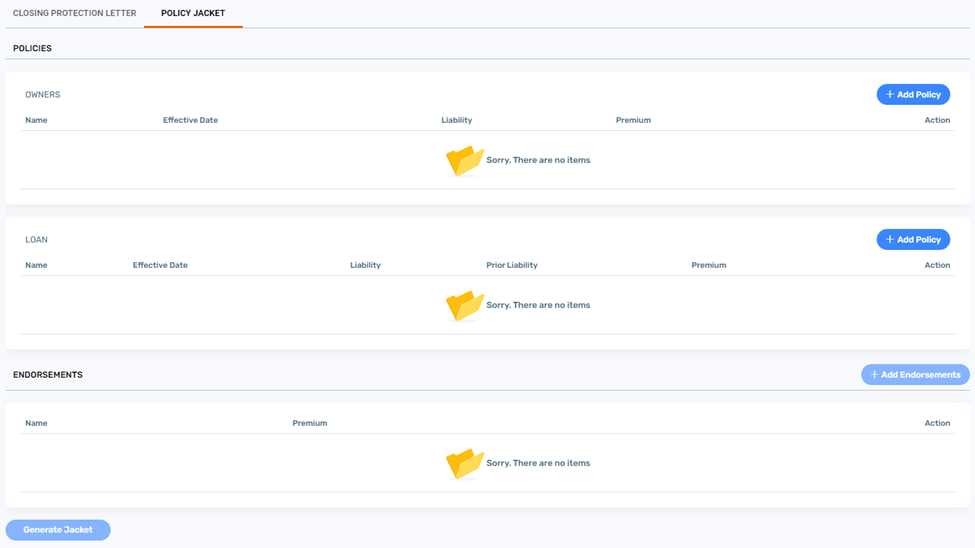
Policy Jacket
The Policy Jacket access for Old Republic requires the user to enter Starslink account credentials on the System settings / Integration settings page. The Policy Jacket page then appears in the Old Republic menu, provided that the selected Underwriter is Old Republic.
Users can choose jackets for both Owner’s and Loan type of policies in their respective sections.
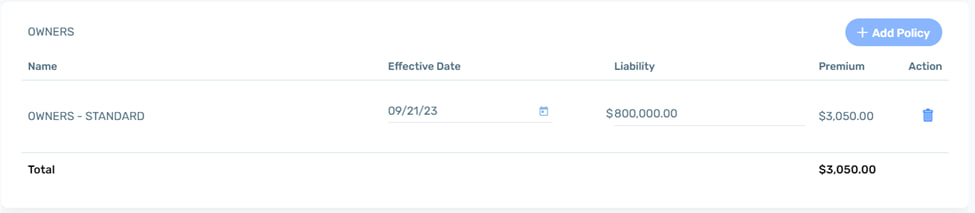
To choose an Owner’s policy user clicks on the +Add Policy button in the top left corner of the Owner’s section. A popup will appear where a list of available Owner policies is shown. This list is provided by the partner.User can select any policy shown on the list, but only one owner’s policy per file.
When the policy is added the liability will be automatically pulled from the Purchase Price field in Profile, the premium is automatically pulled from the System Calculated Charges section in the Invoice. User can edit the effective date or keep the default today’s date in the field.
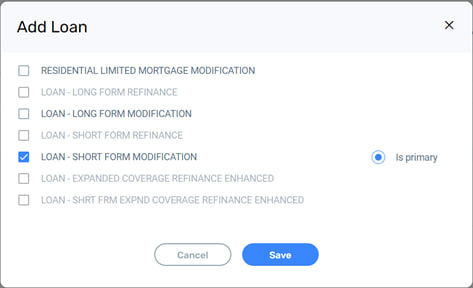
To choose a Loan policy or policies, the user clicks on the +Add Policy button in the Loan section similar to the Owner’s section. The number of loan policies that users can select depends on the number of lenders added to the Profile.
By default, the first policy that the user selects becomes a Primary lender policy. Users can reassign primary status to a different policy if more than one policy is selected.
Note that when one policy is selected, all policies that cannot be ordered jointly with the selected policy are filtered out automatically.
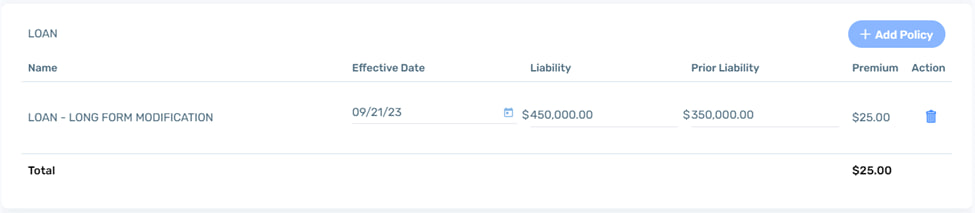
When the policy is added, the liability will be automatically pulled from the Loan amount for the respective lender in Profile, the premium is automatically pulled from the System Calculated Charges section in the Invoice.
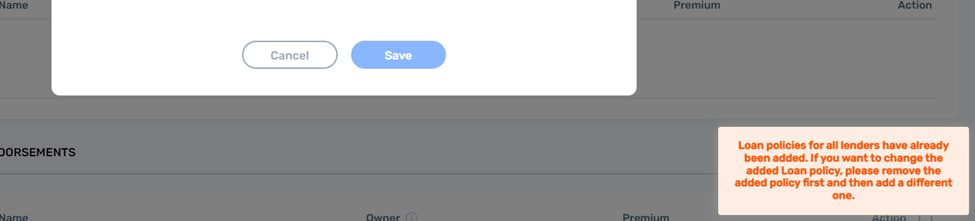
The system will check how many loan policies can be added and will show a message if the user has exceeded the maximum number of policies when selecting them in the popup.
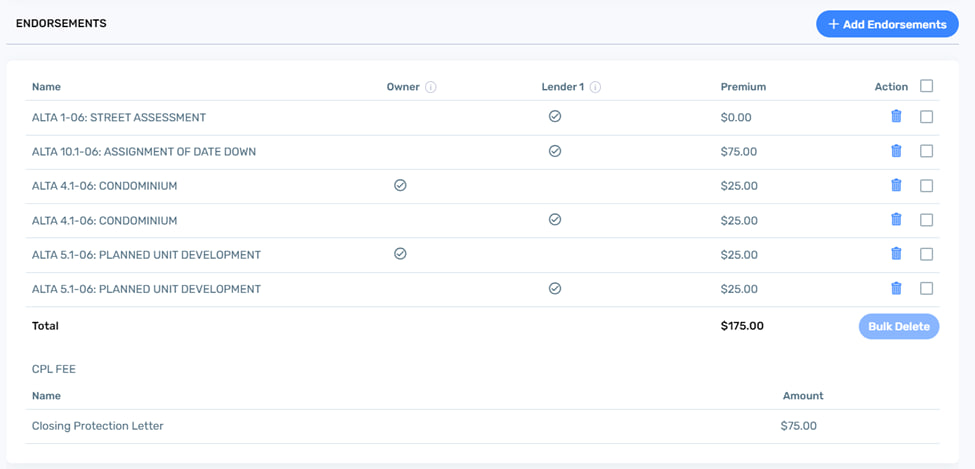
Endorsements are automatically pulled to the Endorsements section from line items on the Invoice page. The line items on the Invoice page are matched to the endorsements provided by the partner, and the matched items are shown in the Endorsements section of the Policy Jacket page. The partner provides amounts of the matched endorsements. When possible, a matched endorsement will be assigned to each of the previously added policies, and for each assigned policy, there will be a separate copy of such endorsement.
In the example below, the ALTA 4.1-06 endorsement was assigned to both Owner and Primary lender policies, so the endorsement is shown twice on the list.
In some states, a CPL fee will be automatically calculated if an active CPL exists for the file. This fee is added to the CPL FEE subsection at the bottom of the Endorsements section.
Users can add extra endorsements, select the policy or policies to assign endorsements to, and remove matched endorsements if necessary.
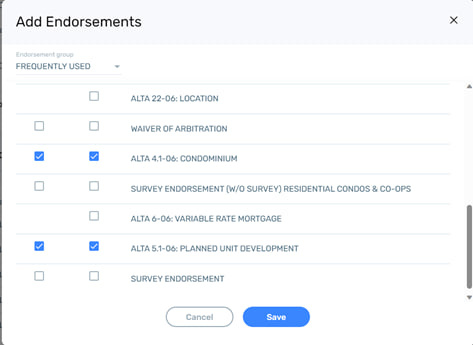
Users can add new endorsements by clicking the +Add Endorsements button and calling a popup with a list of endorsements. This list is provided by the integration partner. Users can choose which policy the selected endorsement will be assigned to by checking a checkbox in a column for the respective policy. If a checkbox is not available in a column, this means that the endorsement cannot be associated with this policy. The checkboxes for the endorsements already added to the section, will be checked automatically.
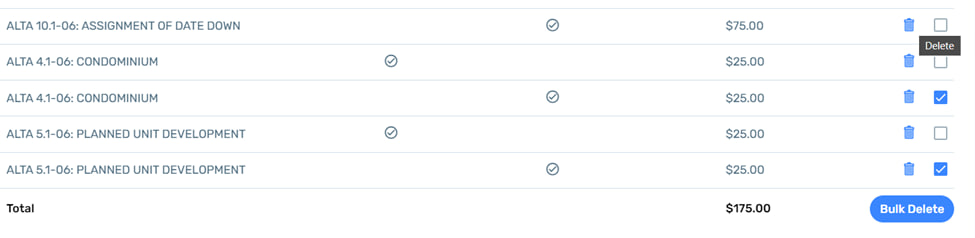
To remove an endorsement user can click on the trash can icon and confirm action in a popup message. To delete multiple endorsements at once user can check the checkboxes and click the Bulk Delete button.
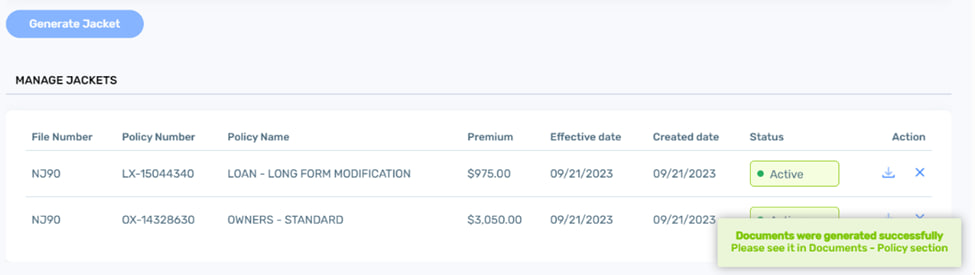
When all policies and endorsements are added the user can generate the policy jacket by clicking the Generate button. The successful generation will be confirmed by a message.
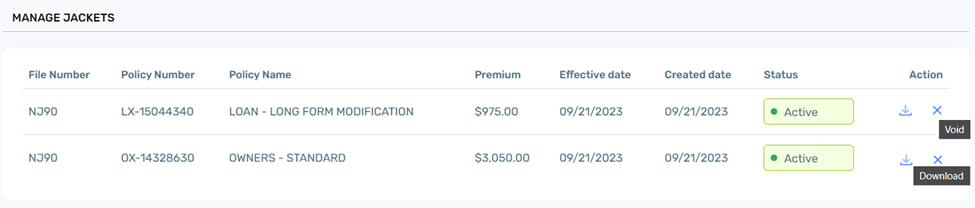
The generated policies will be added to the Manage Jackets section where user can view the policy status, download the policy and void the policy by clicking the Void icon. It is necessary to void active policies to create a new policy for the same file.
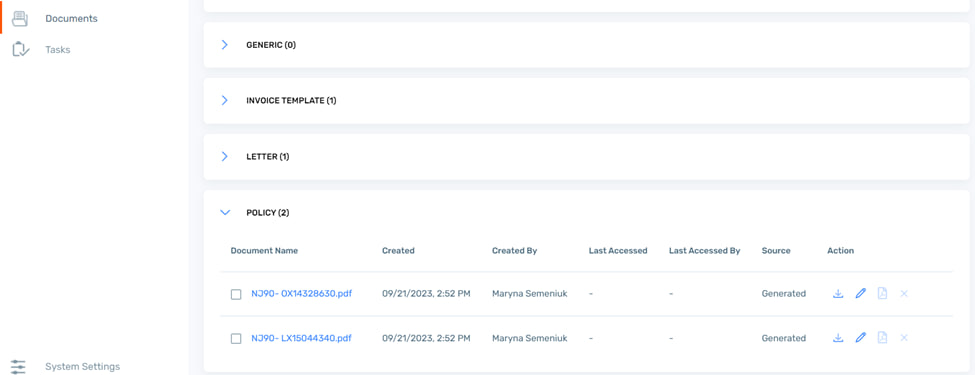
The generated policy jackets will also be saved in the Documents section.
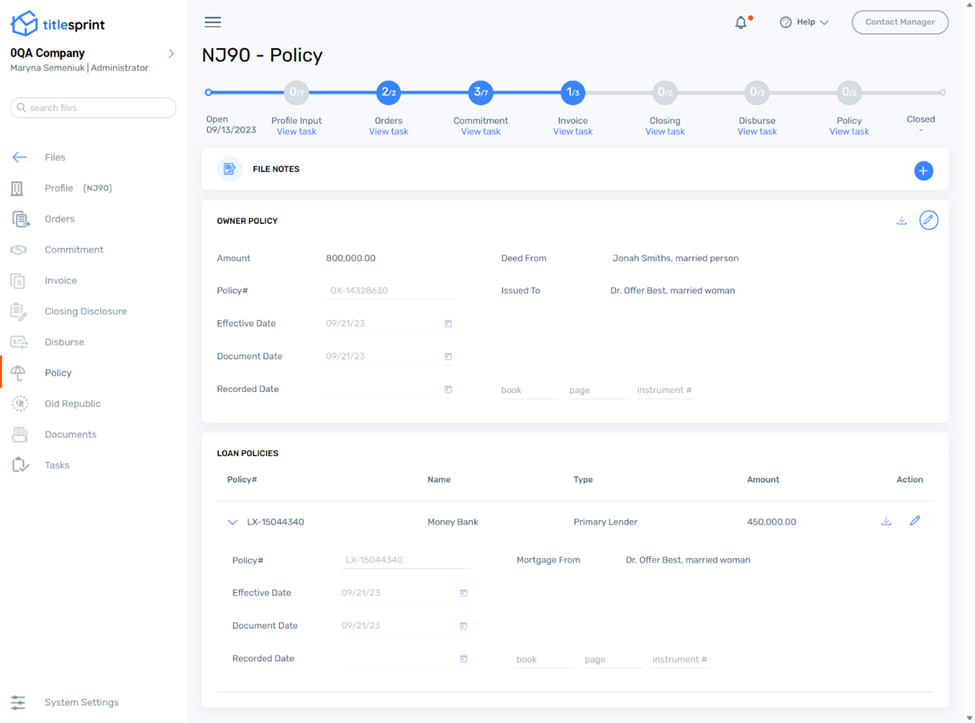
The policy numbers of the generated policies are populated on the Policy page for their respective policies.
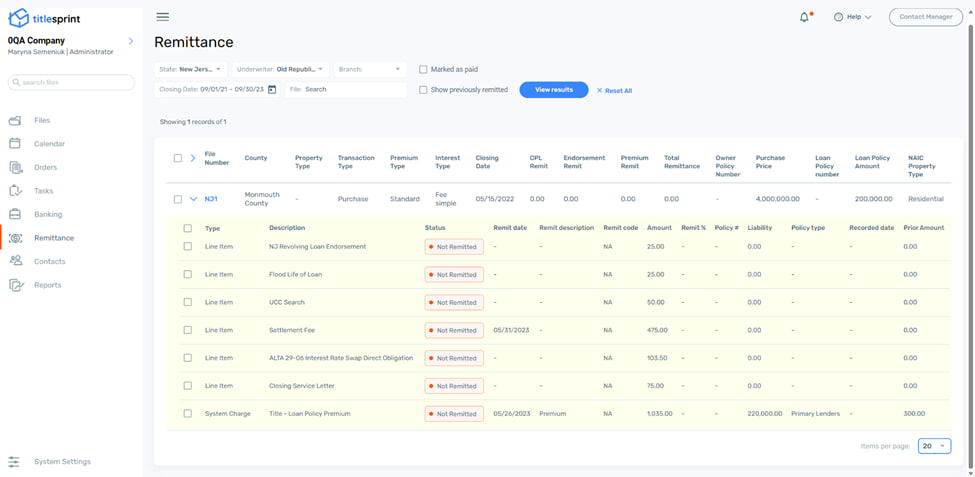
Remittance
When the work on a file is completed, and the closing date on a file is set, a user can remit all the expenses incurred while working on a file. The expenses are collected in the Remittance section. Users can search for a specific file or files first, using the underwriter and closing date filters. Files can also be filtered by name.
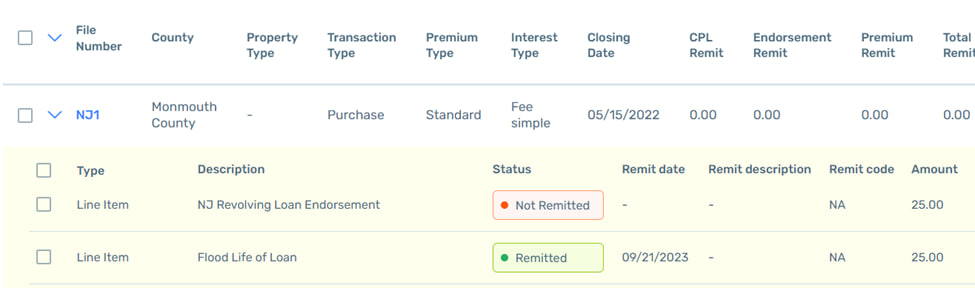
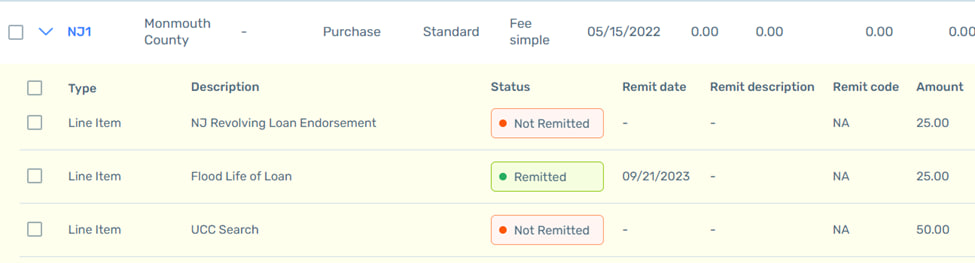
When a file is found, a user is presented with the complete list of expenses in the file with expense details and remittance status.
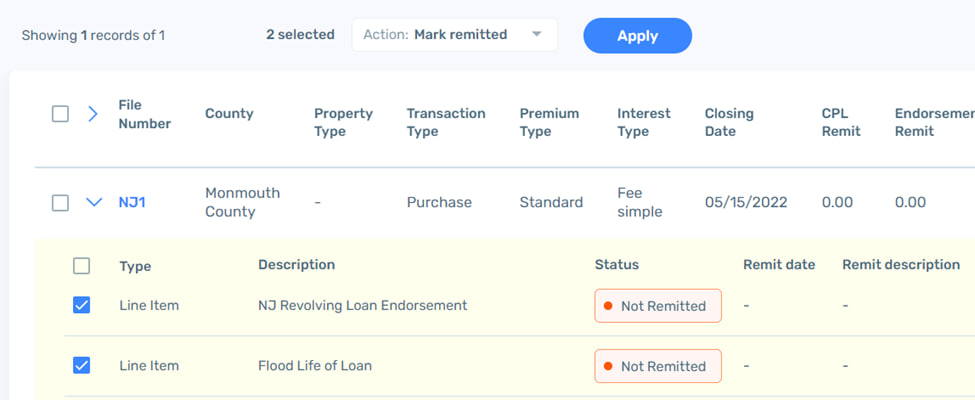
Users can remit files individually or in bulk by checking respective checkboxes.
The number of selected items will be shown, and the action menu activated. In the action menu, users can choose to mark selected items as remitted, remit them through banking, or mark Unremitted the items that have previously been remitted with Mark Remitted action. Note that the Mark Unremitted action is unavailable for the items remitted with Remit action.
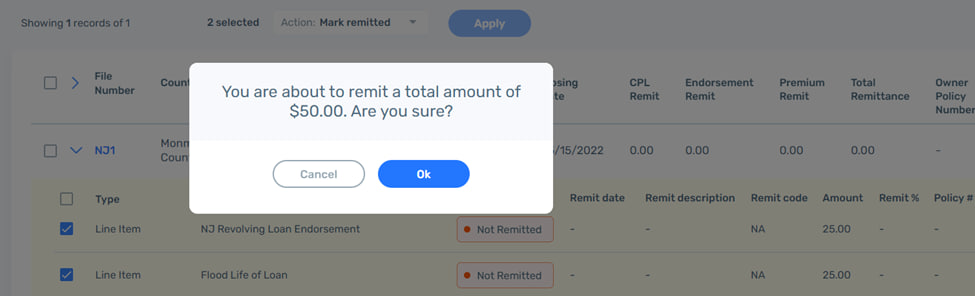
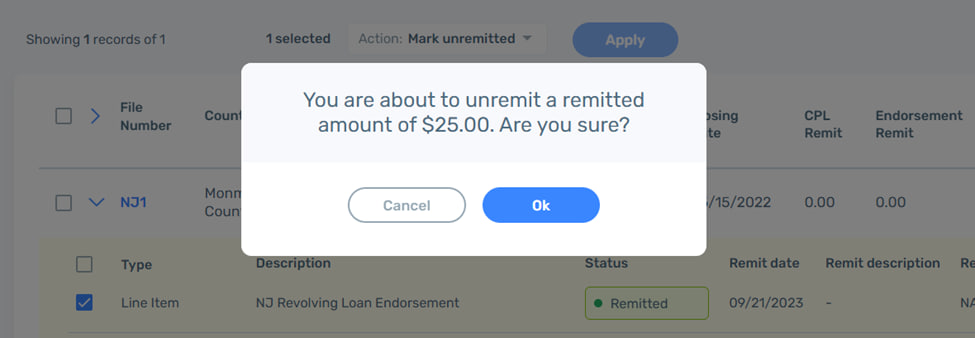
When making a Mark Remitted action, the user is prompted to confirm the action and is shown the remitted amount for the selected items.
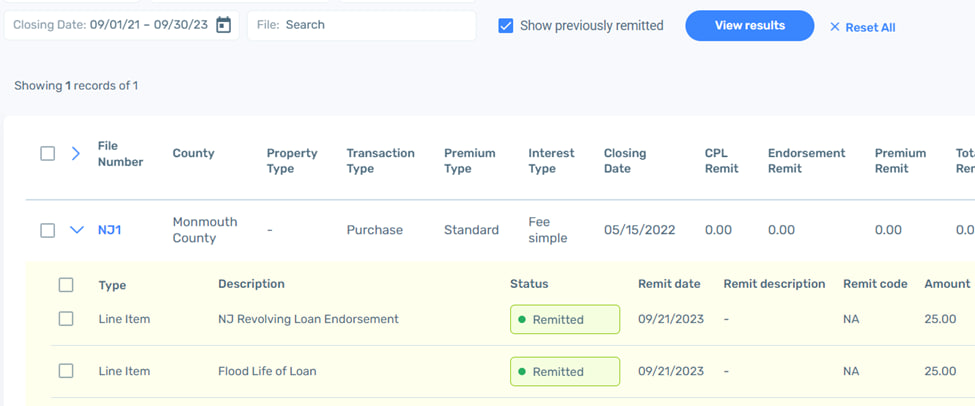
When action is confirmed, the status of the items is changed to Remitted. To see the remitted items, the user can check the Show previously remitted box in the filters at the top of the page.
The Marked Remitted items can be unremitted by checking the item and selecting the Mark Unremitted action.
Following confirmation, the status of the selected item will be returned to Not remitted
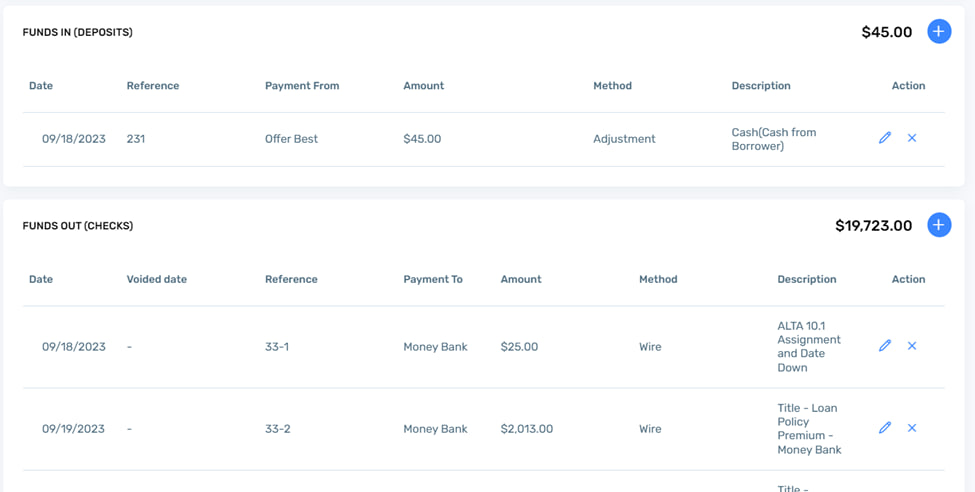
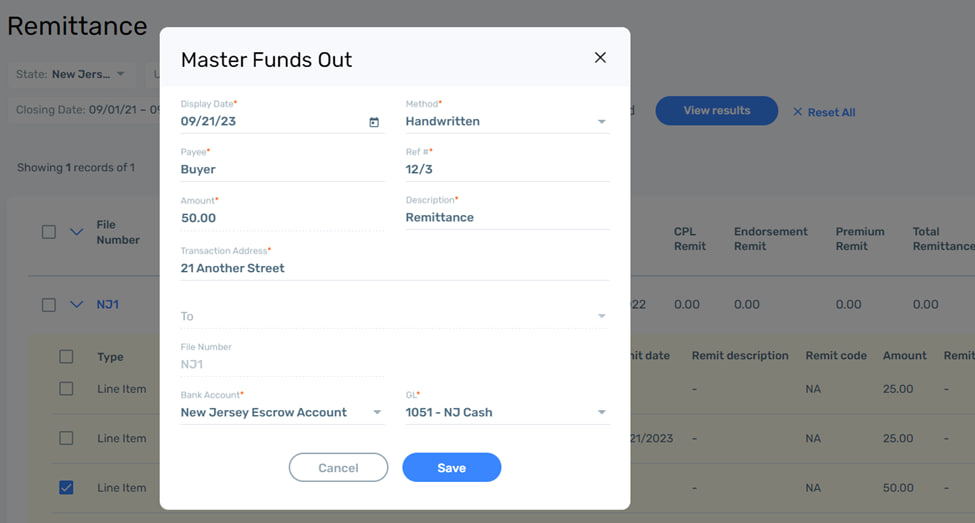
When a user makes a Remit action on a selected item or items, a popup is shown where the user can manually create a bank transaction for the total amount of the selected items. Users can select payment method between Handwritten, Wire, and Printed; select a Bank Account and GL from the dropdown; and edit other active fields manually.
When the form is saved funds out record is created in the Disburse section in the file and the Banking menu, and the item will assume the status Remitted.
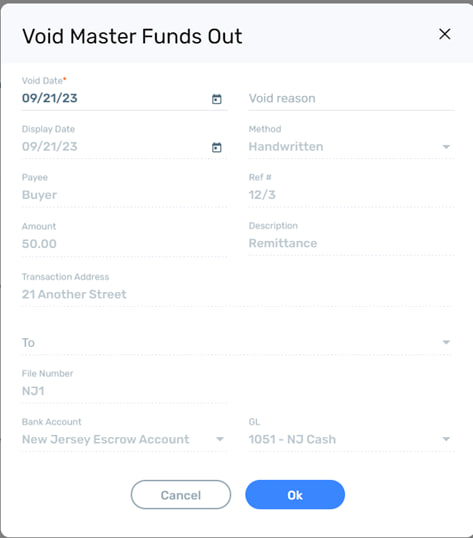
It is possible to unremit the item remitted via the Disburse section in the file. To unremit the item, the user can locate it in the Funds Out section and click the Void button.
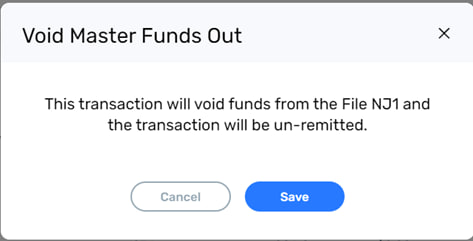
A popup screen will appear with payment information, which will not be editable. To confirm the action, the user can click Ok.
A final confirmation will be shown. To finalize the action, the user clicks Save.
The item will receive a voided date on the Disburse screen.
The item status will change back to Not Remitted on the Remittance screen.